Buildora
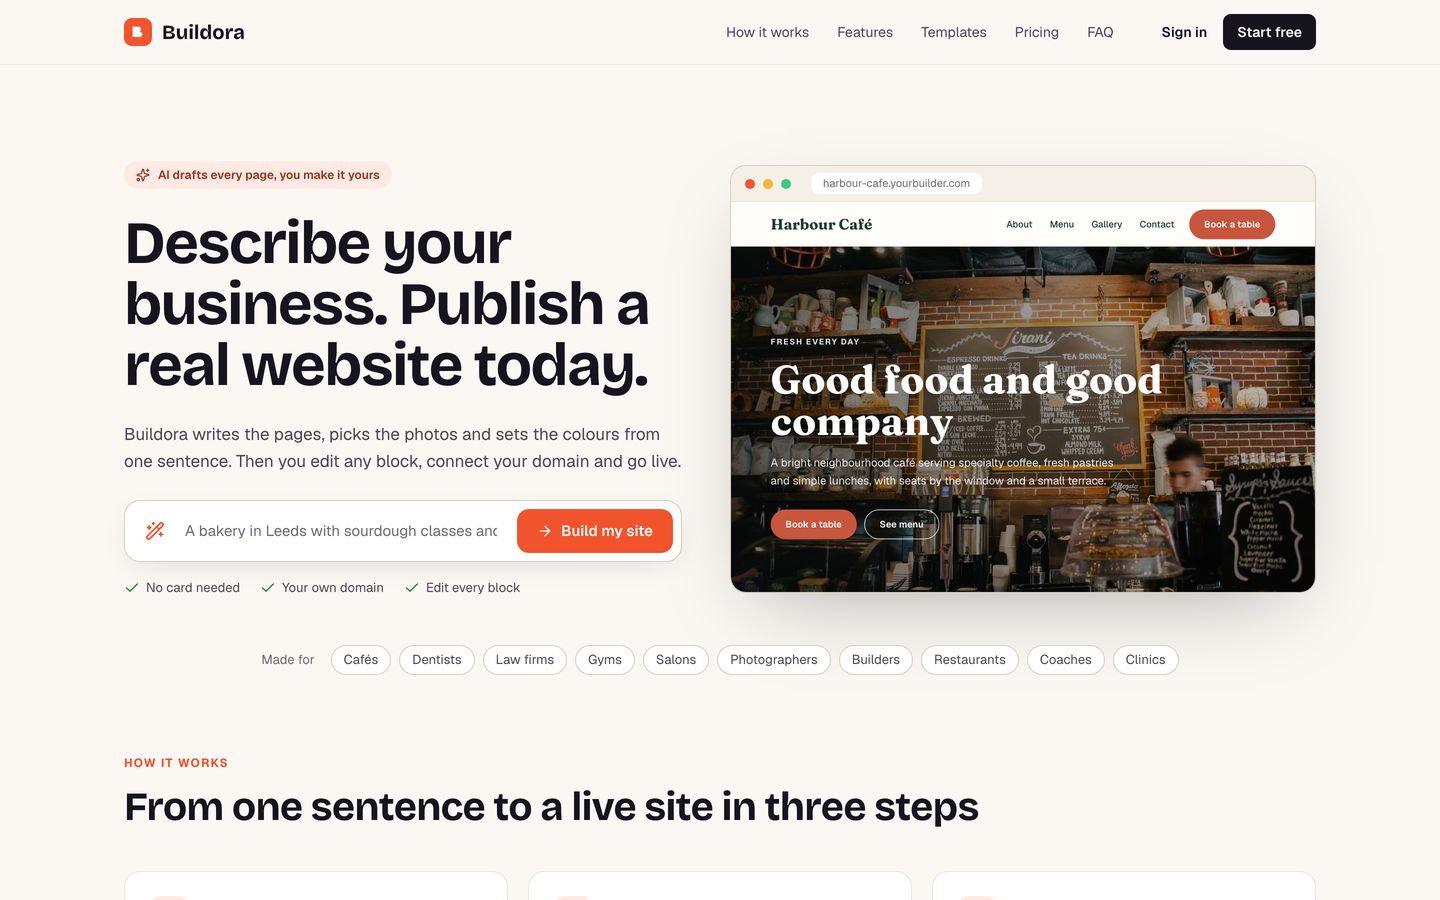
An AI website builder you run as your own business. Your customers describe their business in a sentence, the AI writes a multi-page website, they edit every block, and publish it to a free address or their own domain. You sell plans with Stripe and run everything from an admin panel.
1. Welcome
Thank you for choosing Buildora. This guide takes you from the download to a running website-builder business. It is written for beginners: every command is shown in full, and every setting says where to find it.
What you get
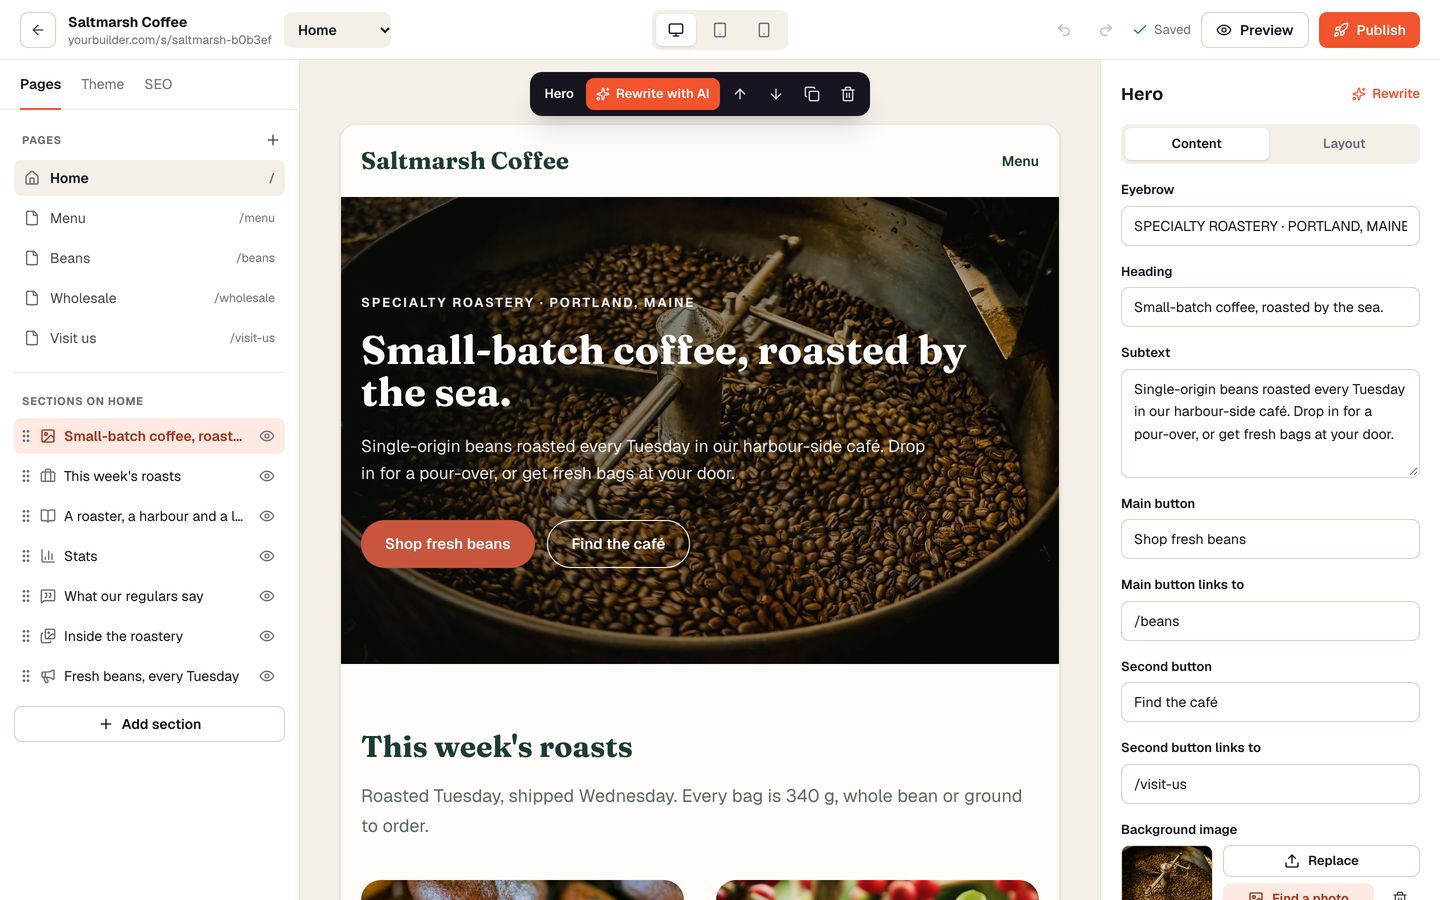
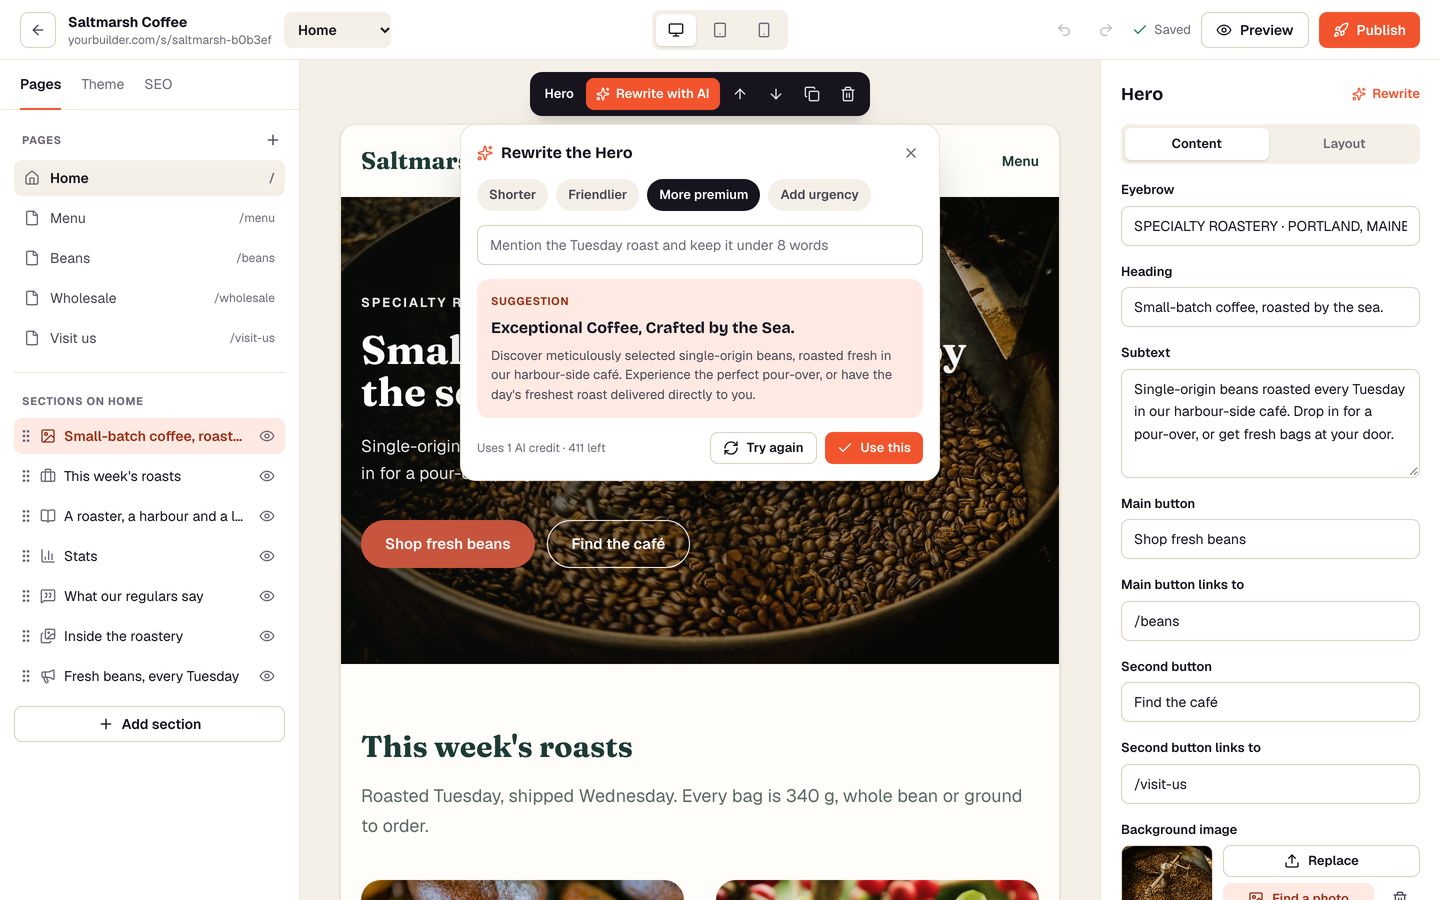
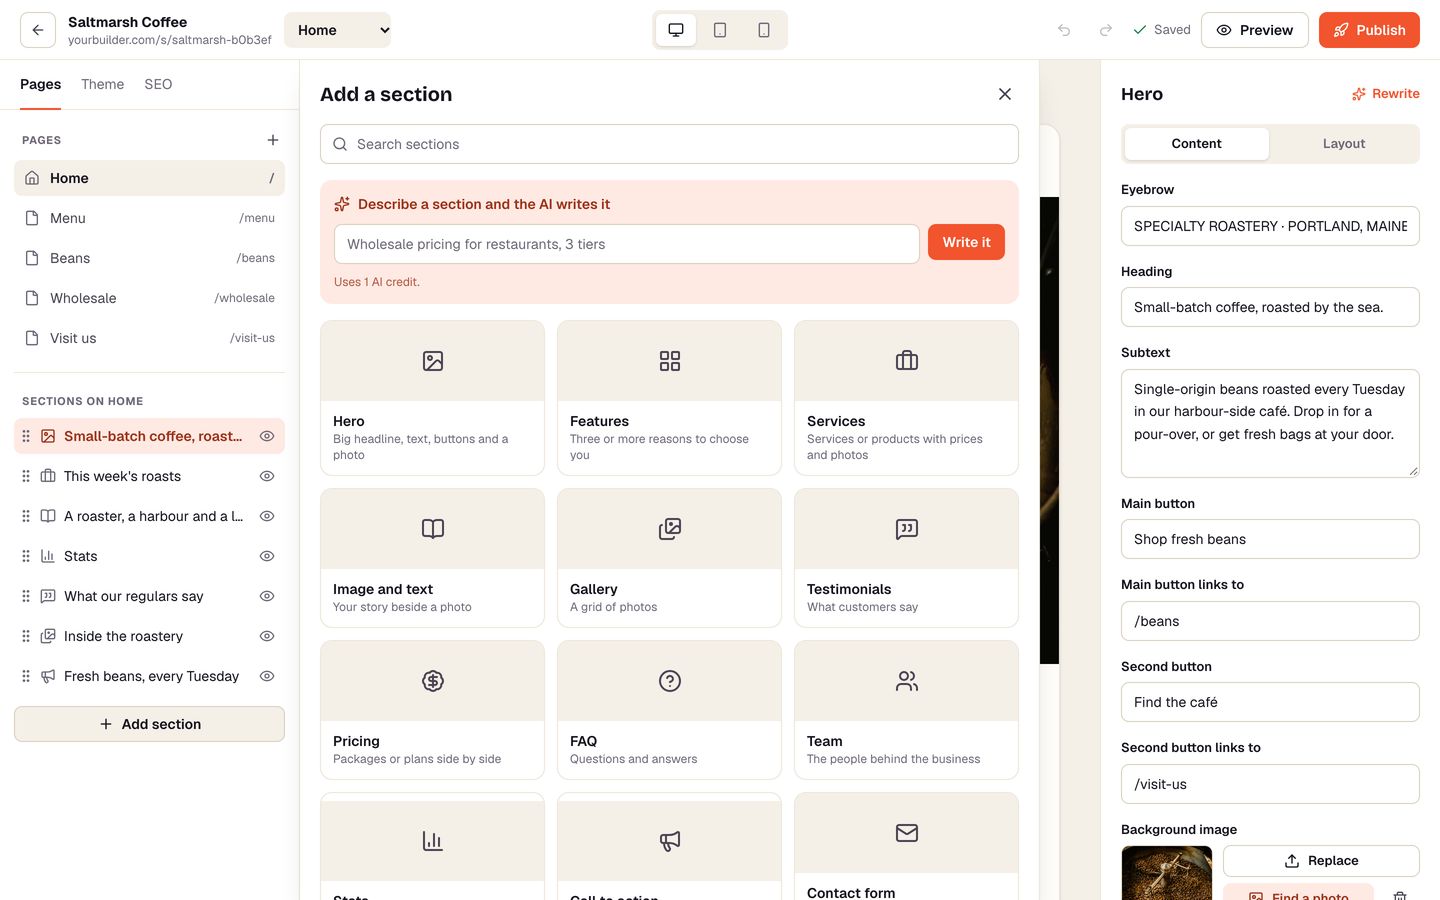
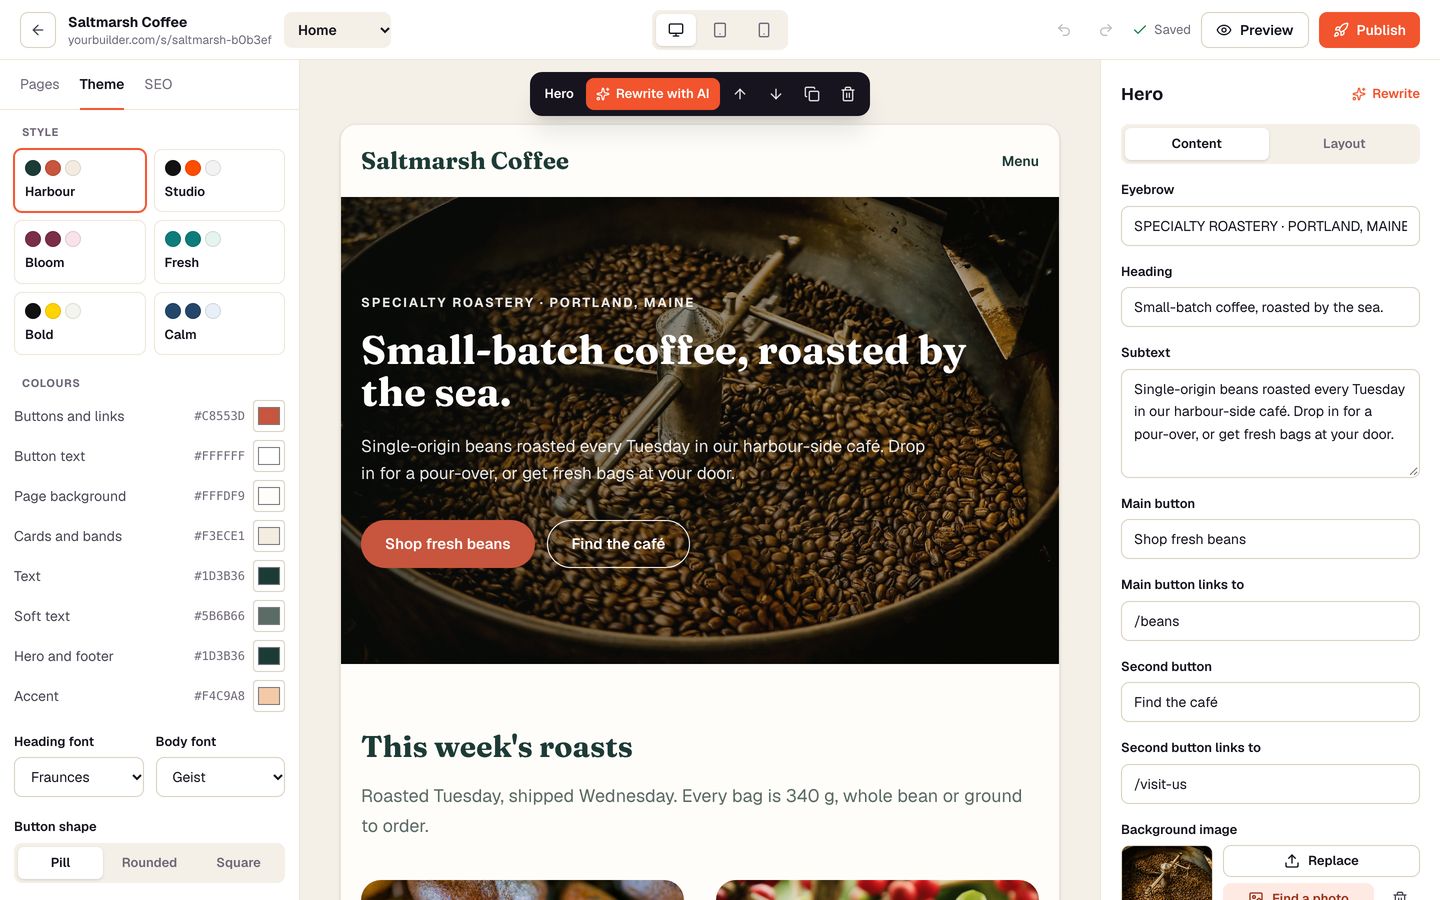
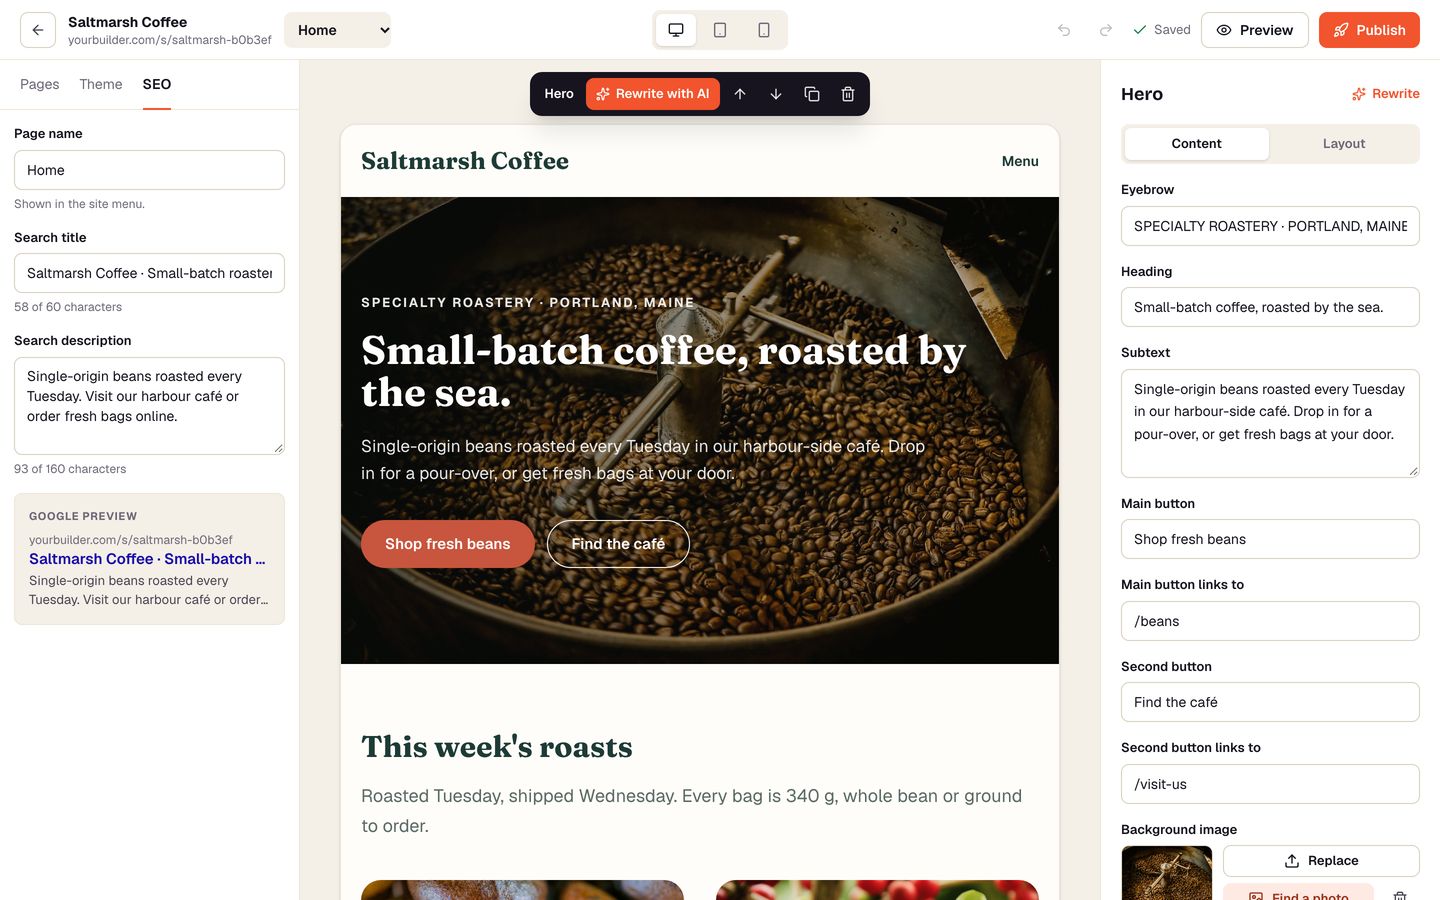
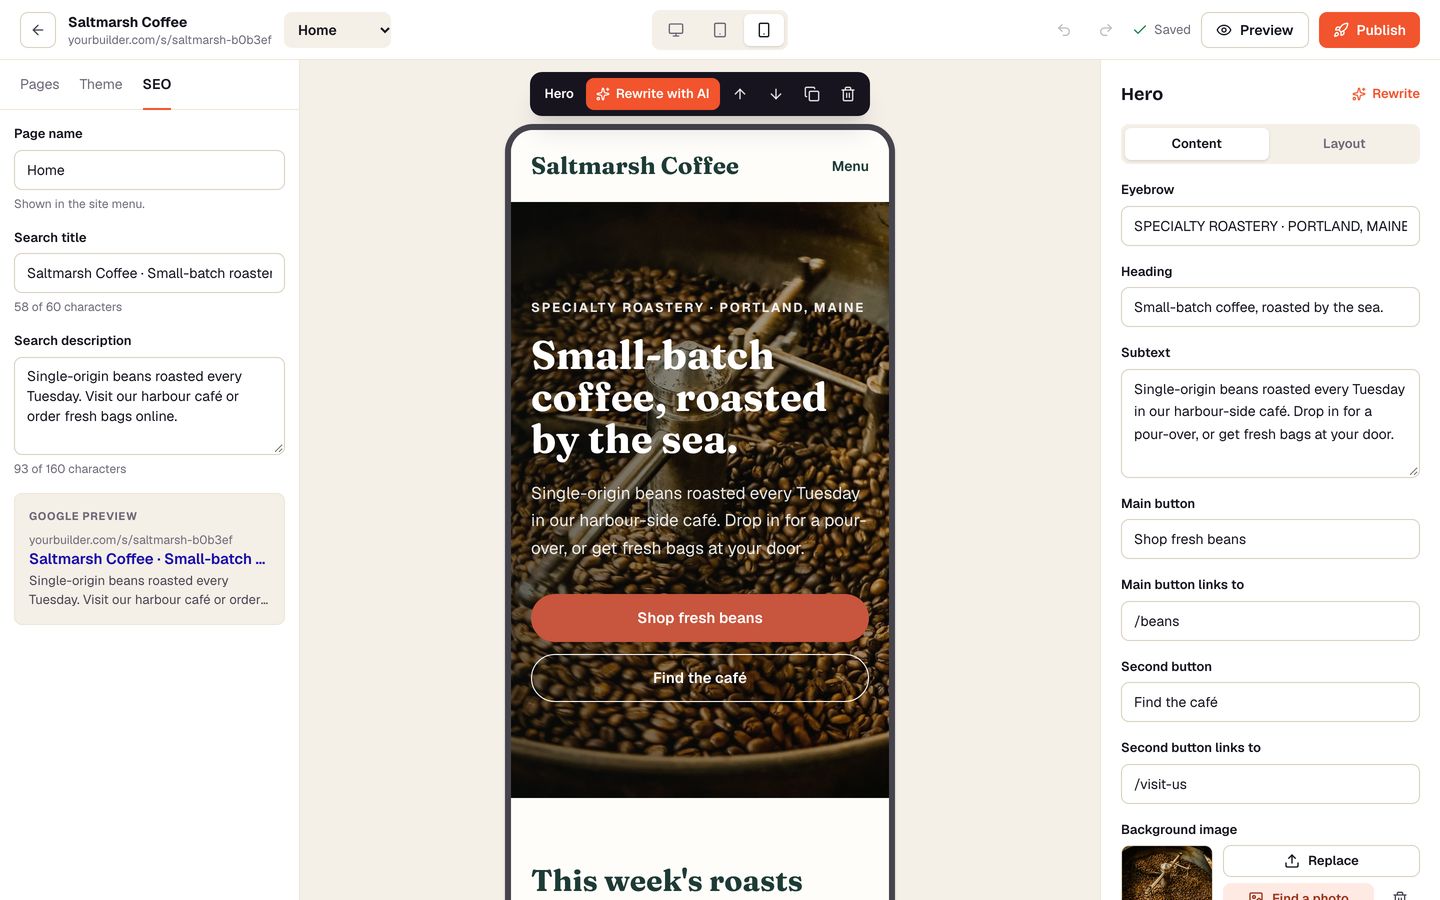
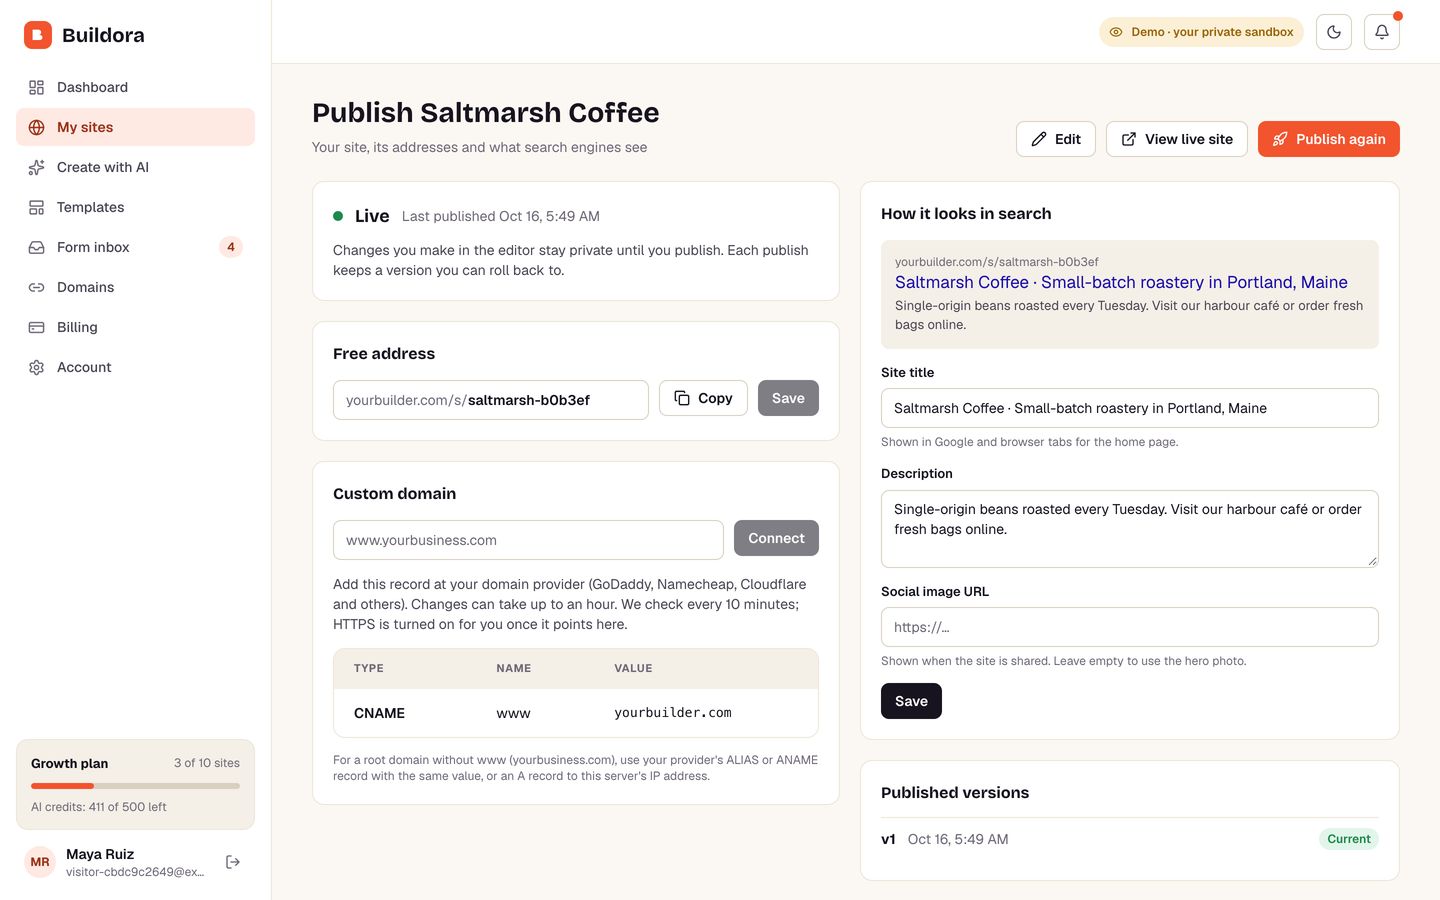
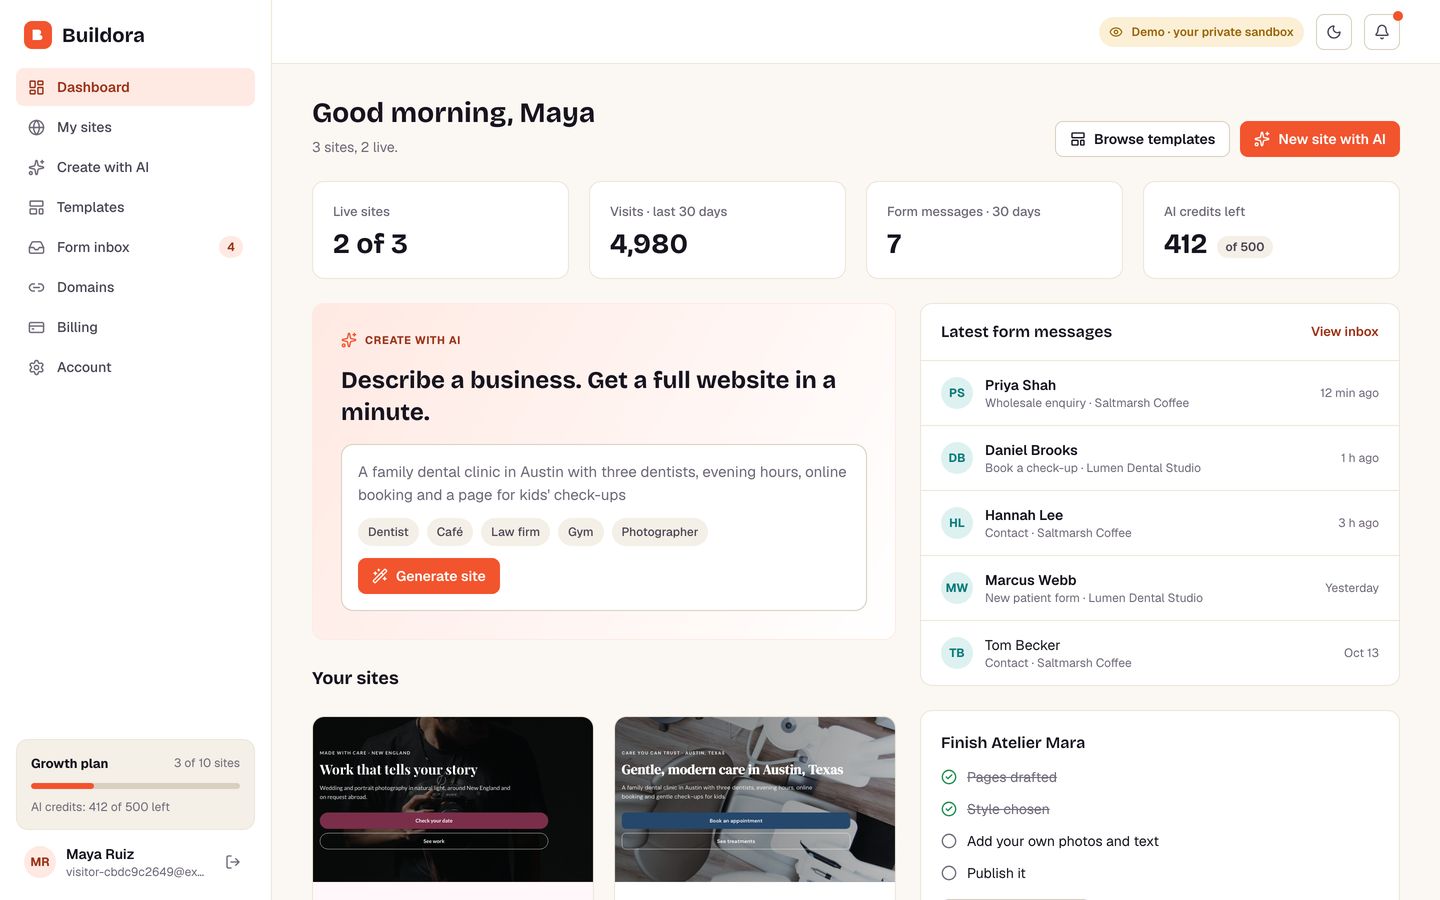
- The builder for your customers: an AI site wizard, a block editor (14 section types, drag and drop, undo, autosave), AI rewrite for any section, themes, SEO settings, phone and tablet preview, publishing with version history, a form inbox, custom domains and billing.
- Published websites: fast server-rendered pages, each on
name.yourdomain.com, atyourdomain.com/s/name, or on the customer's own domain with automatic HTTPS. Each site gets its own sitemap and robots file. - The admin panel for you: revenue, users, sites, plans, payments, templates, AI settings, a setup check for every outside service, and branding.
- An install wizard, eight ready templates, three plans and sample sites, so the app is full the first time it opens.
- One-command self-hosting with Docker (app, PostgreSQL, file storage and optional HTTPS).
What is in the download
| Folder | What it is |
|---|---|
buildora_web_nextjs/ | The whole application: builder, admin panel, API and published sites (Next.js 16, TypeScript, Prisma, PostgreSQL). |
deploy/ | Docker Compose stack, Caddy HTTPS config and the .env.example for it. |
docs/ | This documentation as HTML and PDF. |
CHANGELOG.md, LICENSE.txt | Version history and licence notes. |
Screenshots
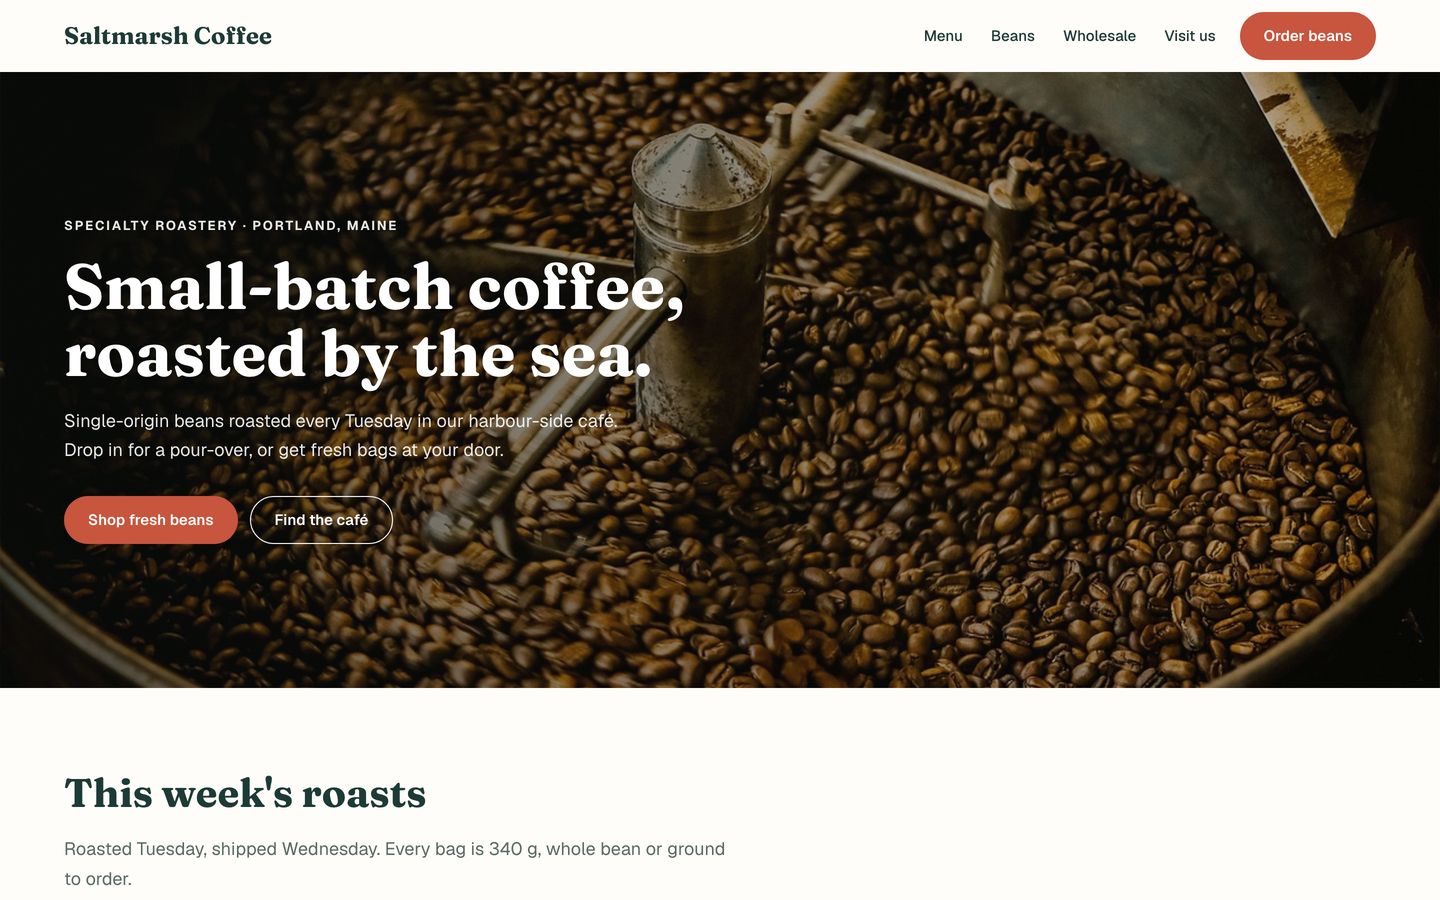
The builder (your customers)
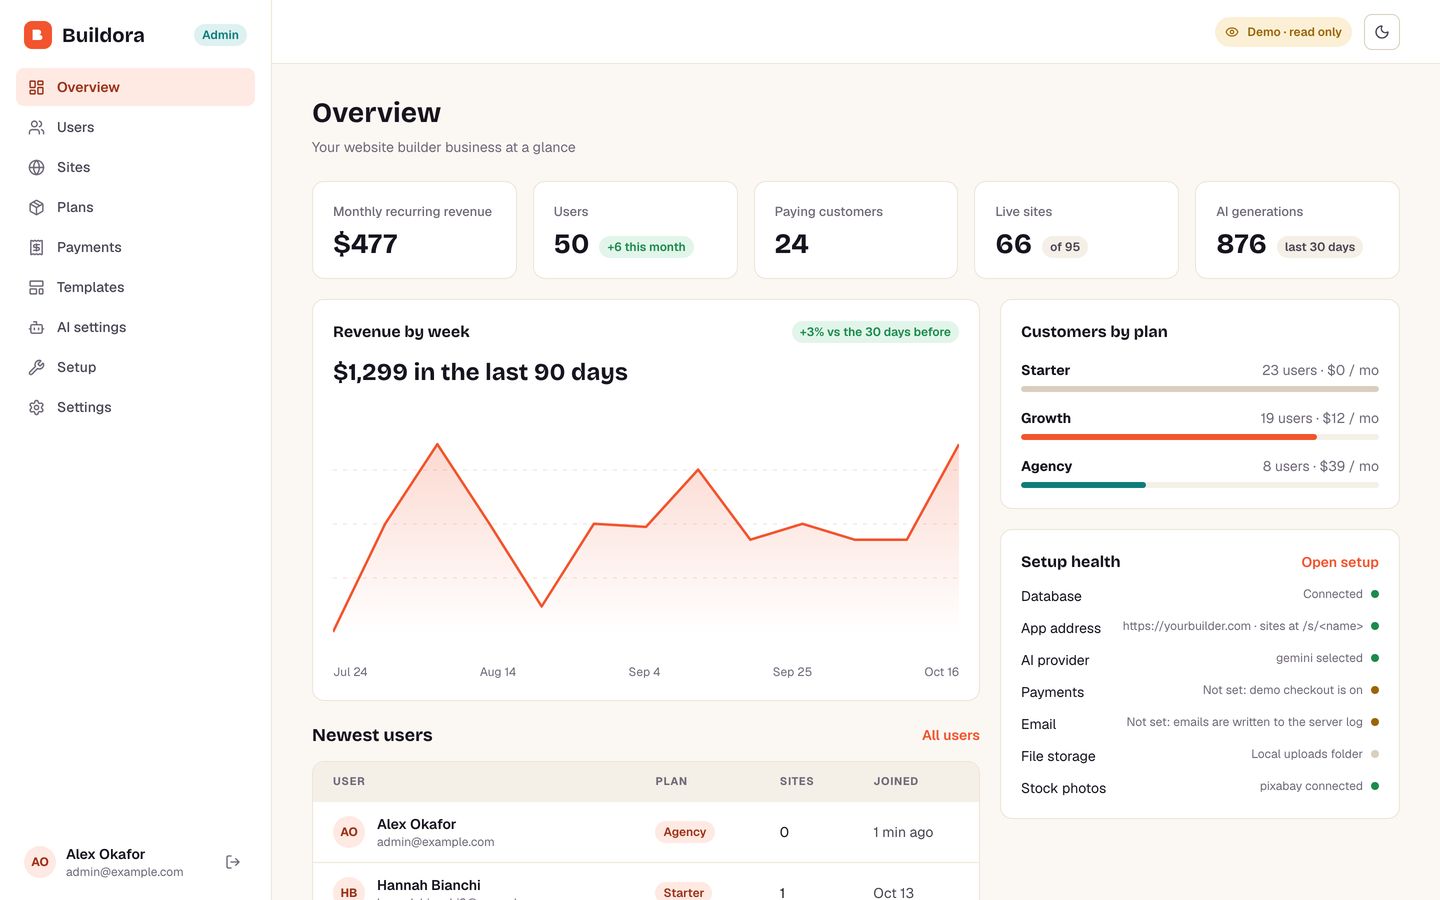
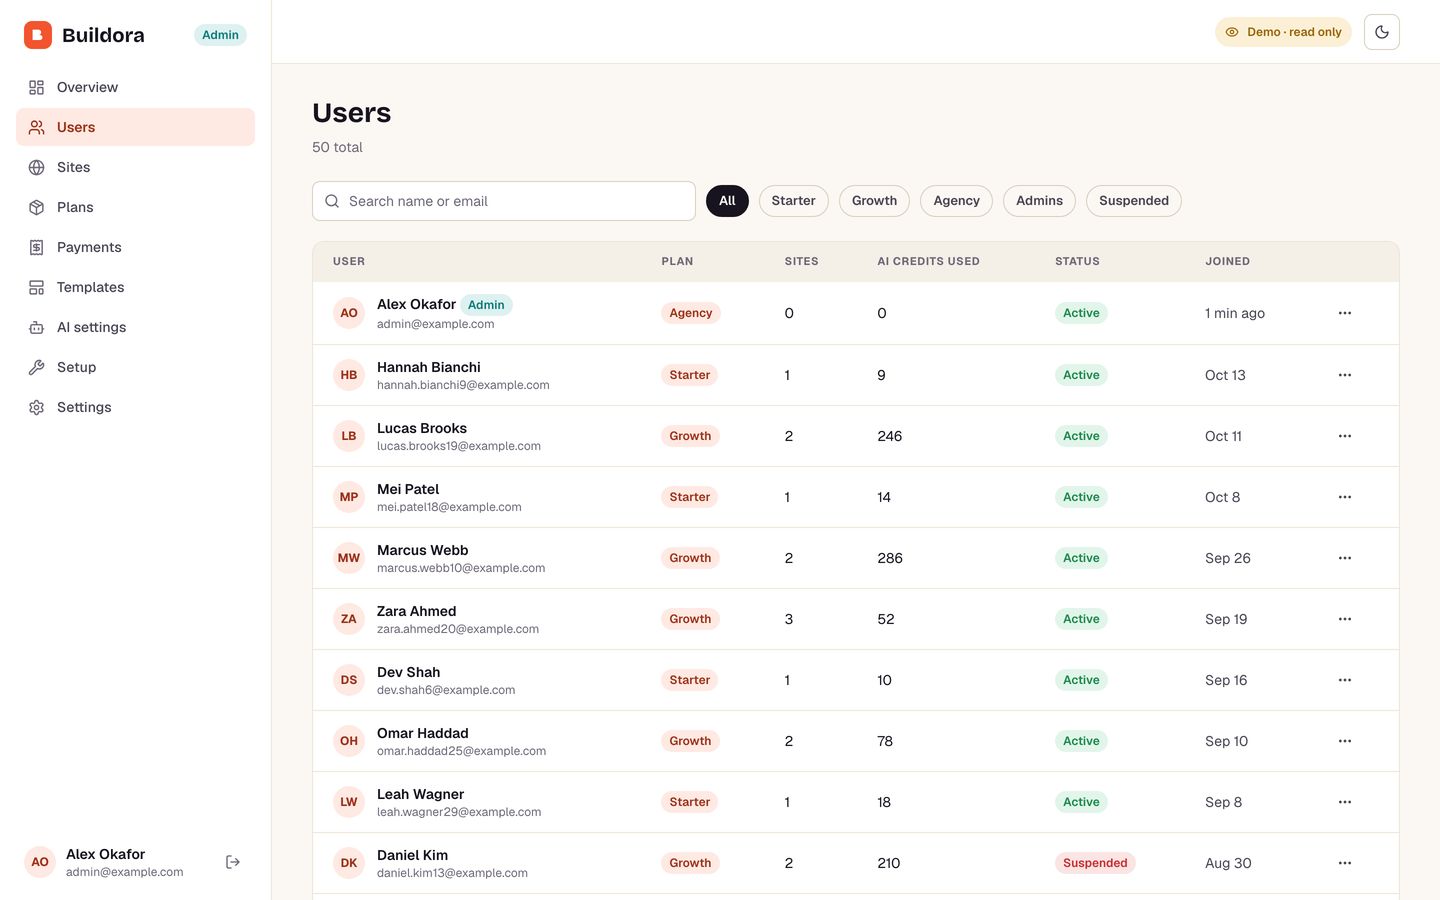
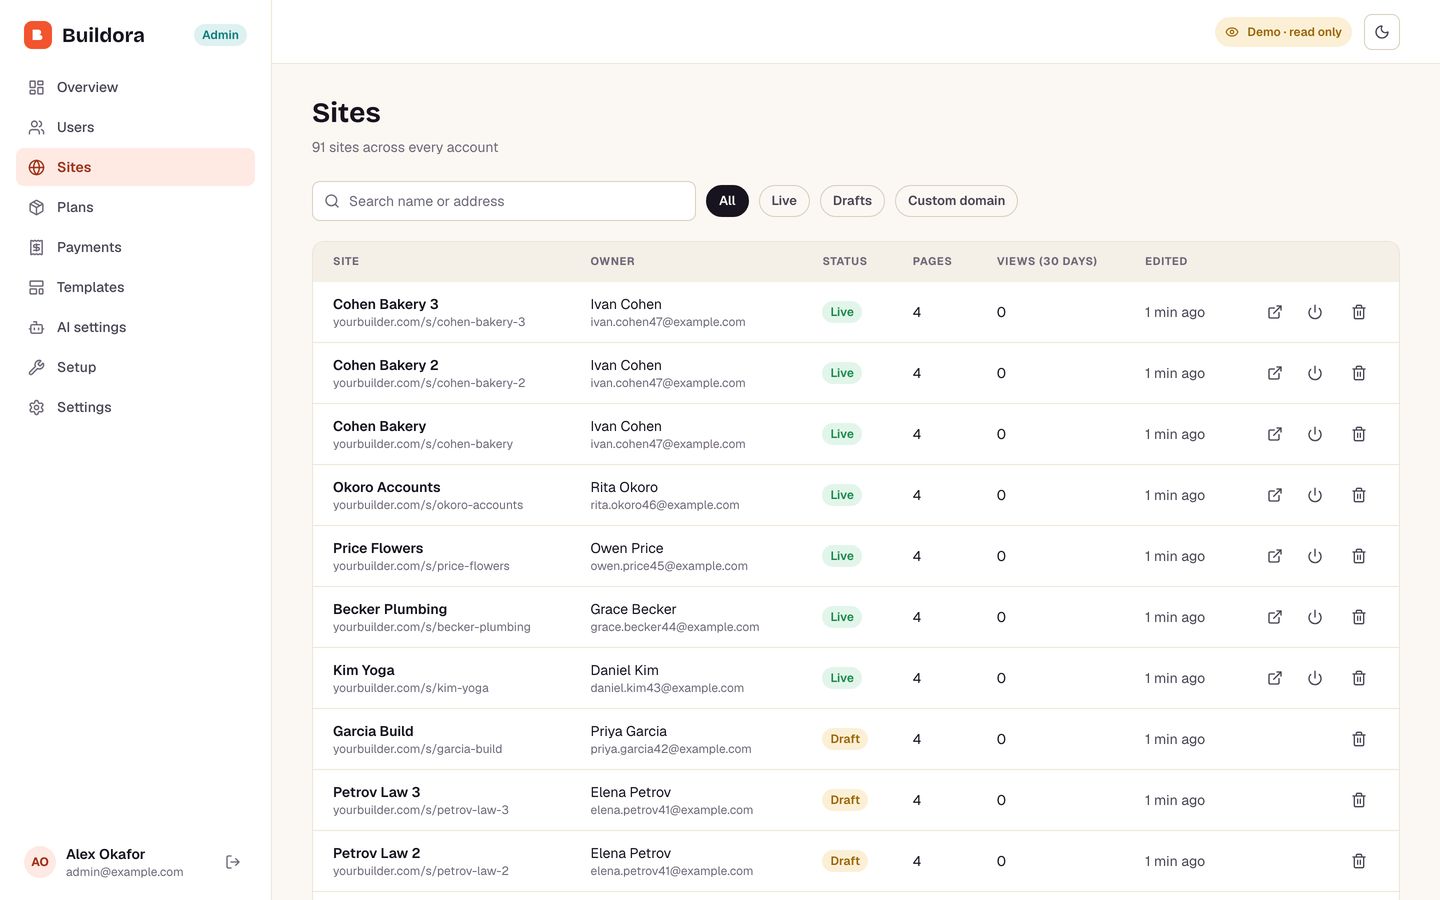
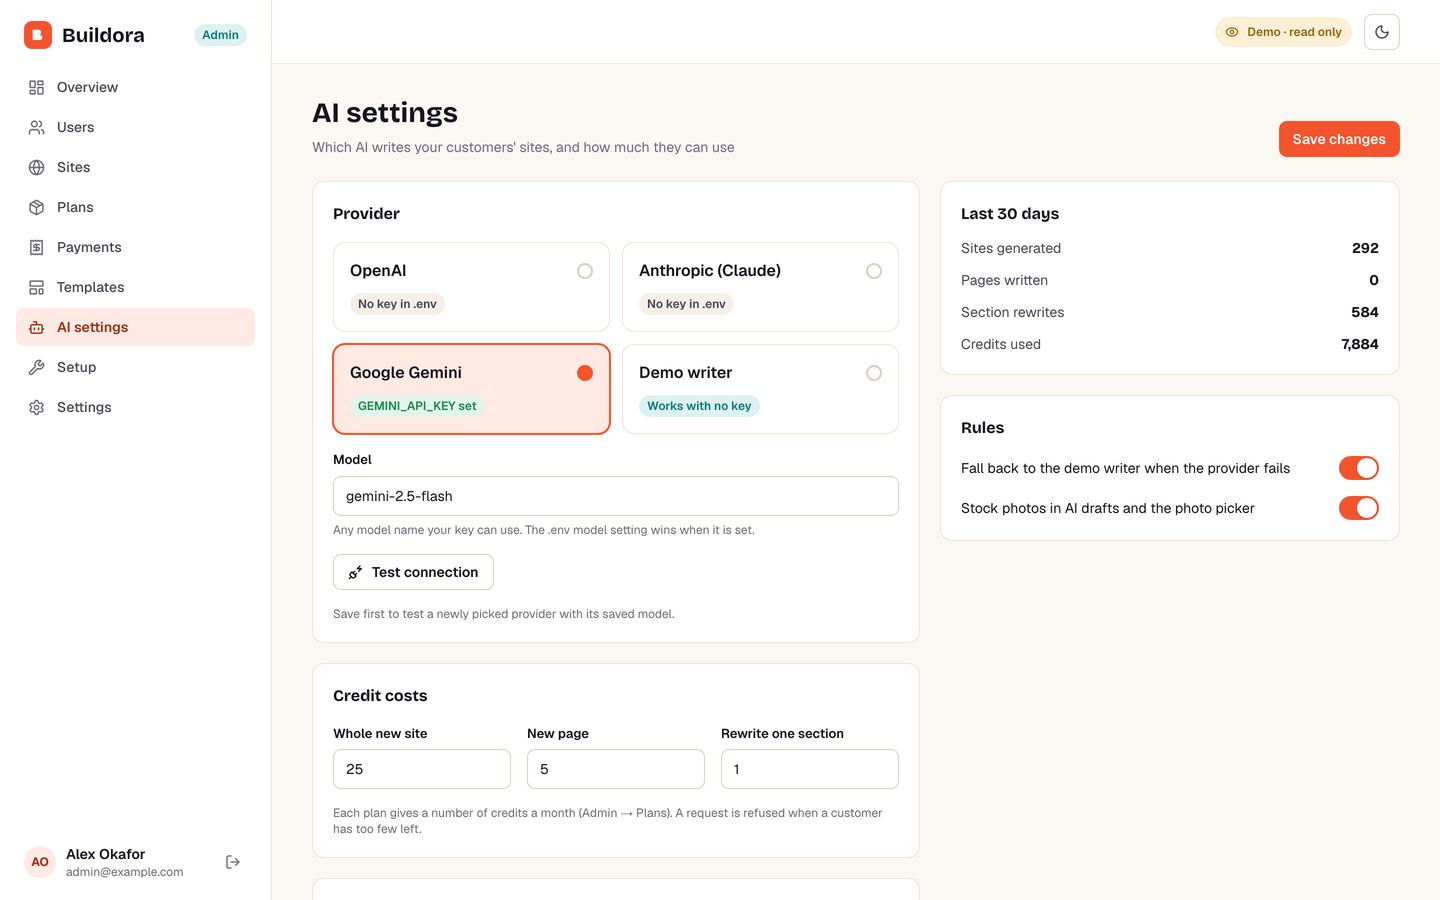
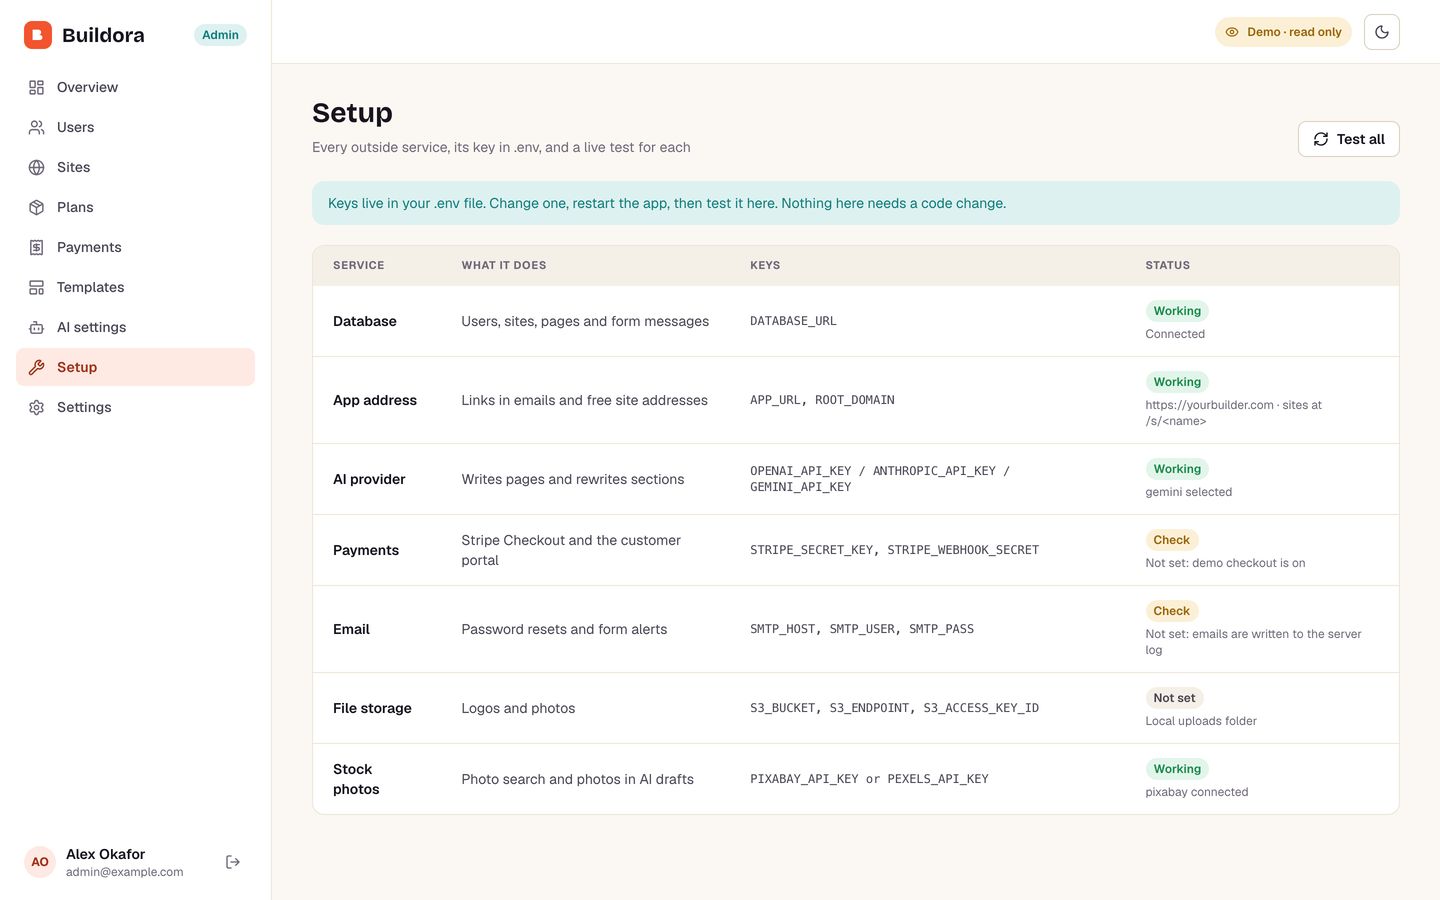
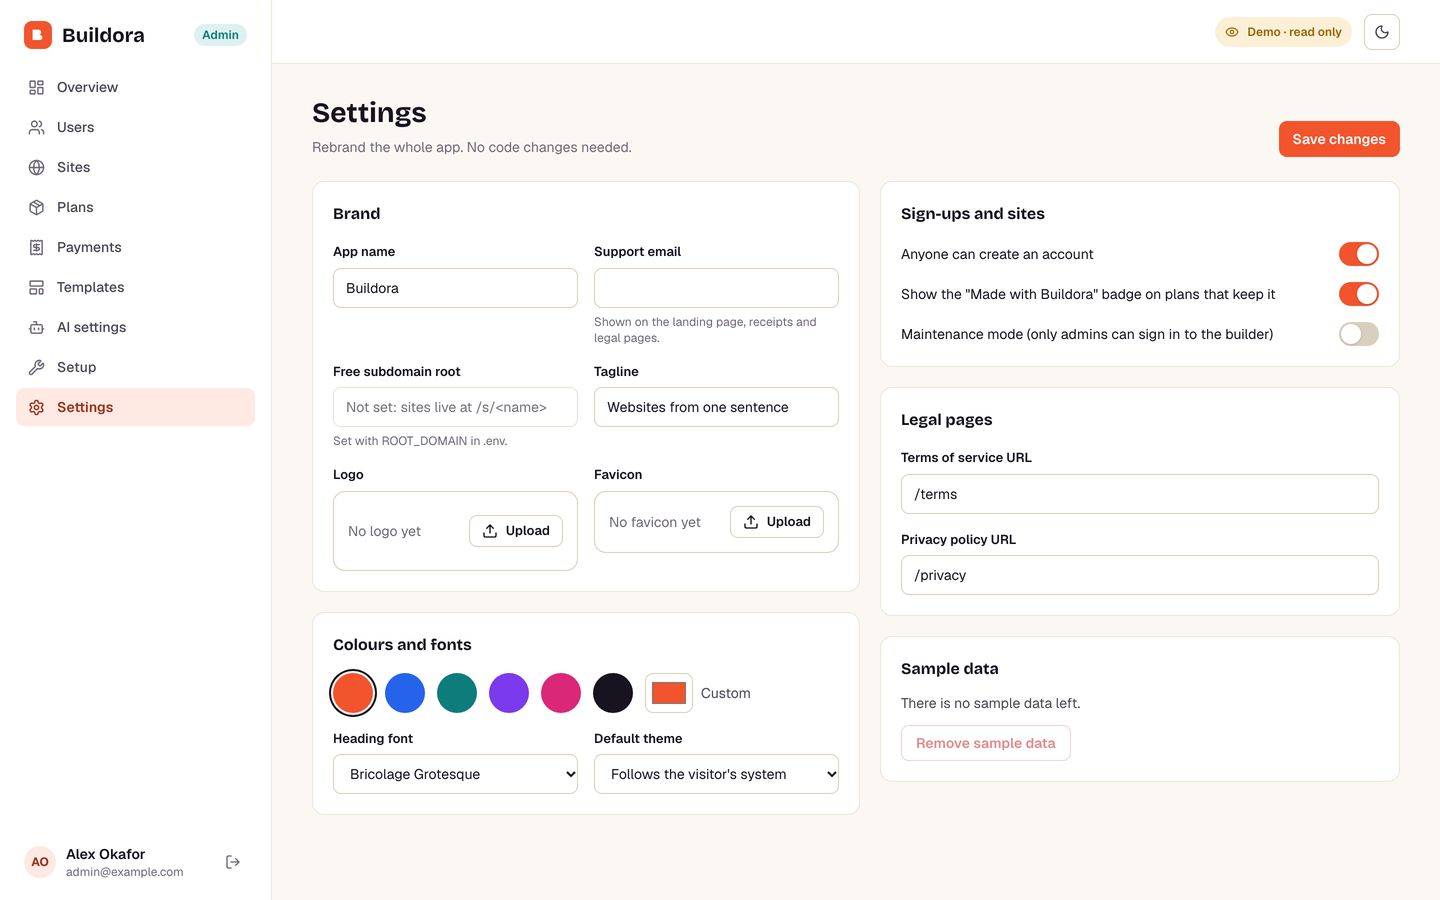
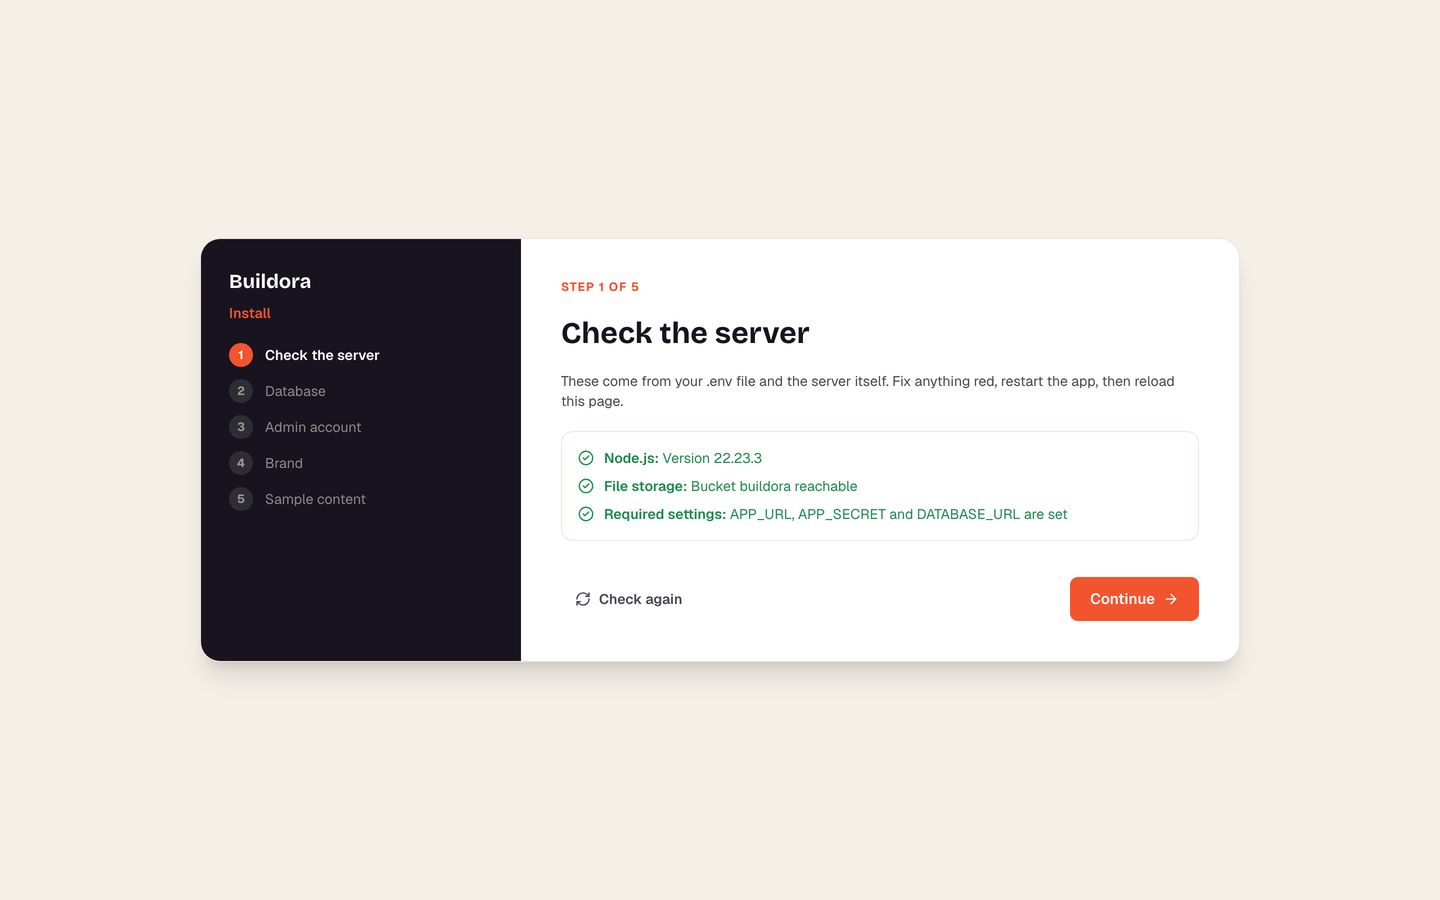
Install and admin panel (you)
2. Requirements
You need one of these:
- Docker (recommended): any Linux server or computer with Docker Engine 24+ and Docker Compose v2. A VPS with 2 GB RAM and 2 CPU cores is enough for a start; the first build needs about 4 GB of free disk.
- Without Docker: Node.js 20 or newer (22 recommended), pnpm 10 or newer, and PostgreSQL 15 or newer.
For a public launch you also need a domain name (for example yourbuilder.com) where you can add DNS records.
Everything else is optional and can be added later: an AI key, a stock photo key, Stripe, SMTP email and S3 storage. Without them Buildora still works, using its built-in demo writer, a test checkout, log-only email and local file storage.
Third-party services (accounts you will create)
| Service | What Buildora uses it for | Needed? |
|---|---|---|
| OpenAI, Anthropic (Claude) or Google Gemini | Writing websites, pages and section rewrites. You pick one in Admin → AI settings. | Optional (the demo writer works without a key) |
| Pixabay or Pexels | Free stock photos in AI drafts and the editor's "Find a photo". | Optional (free keys) |
| Stripe | Monthly subscriptions, invoices and the customer billing portal. | Optional (a test checkout works without it) |
| Any SMTP provider (Amazon SES, Postmark, Mailgun, Brevo, Gmail…) | Password resets and form notifications. | Optional (emails are written to the log without it) |
| Any S3-compatible storage (AWS S3, Cloudflare R2, MinIO…) | Logos and photos. The Docker stack includes MinIO. | Optional |
| A VPS host and a domain registrar | Running the app and its addresses. | For a public launch |
3. Quick start (Docker)
This runs Buildora on your own computer or server in about ten minutes.
- Unzip the download and open a terminal in the
deploy/folder. - Create your settings file:
cp .env.example .env - Open
.envin any text editor and fill in the three required values:
LeavePOSTGRES_PASSWORD=pick-a-long-password # letters and digits only APP_SECRET=paste-a-random-string-here # generate: openssl rand -hex 32 S3_SECRET_ACCESS_KEY=pick-another-password # at least 8 charactersAPP_URL=http://localhost:3000for now. - Start everything:
The first build takes 3 to 6 minutes. It starts PostgreSQL, MinIO (file storage), runs the database migrations and starts the app.docker compose up -d --build - Open http://localhost:3000. The install wizard opens: create your admin account, set your brand, and choose whether to add sample sites.
docker compose logs -f web. To stop it: docker compose down (your data stays in Docker volumes). To use another port, set WEB_PORT=8080 in .env.4. Put it online (VPS, HTTPS)
The Docker stack includes Caddy, a web server that gets free HTTPS certificates automatically: for your app, for every free site address, and for every customer domain once its DNS points at you.
1. DNS records
At your domain registrar, add these records (replace 203.0.113.10 with your server's IP address):
| Type | Name | Value | Why |
|---|---|---|---|
| A | @ (or app) | 203.0.113.10 | The builder and admin panel. |
| A | * | 203.0.113.10 | Free site addresses like joes-bakery.yourbuilder.com. |
| A | sites | 203.0.113.10 | The target your customers point their own domains at (CNAME). |
2. Settings
In deploy/.env:
APP_URL=https://yourbuilder.com
ROOT_DOMAIN=yourbuilder.com
CNAME_TARGET=sites.yourbuilder.com
SERVER_IP=203.0.113.10
3. Start with HTTPS
Open ports 80 and 443 in your server's firewall, then:
docker compose --profile https up -d --buildOpen https://yourbuilder.com. The first visit to each address takes a few seconds while its certificate is issued. Caddy asks Buildora before every new certificate, so only your app, real site addresses and connected customer domains get one.
https profile, forward your app domain, the wildcard *.yourbuilder.com and all other hosts to http://127.0.0.1:3000, and keep the original Host header. Set WEB_PORT=127.0.0.1:3000 so the app is reachable only through your proxy. Customer domains then need certificates from your proxy (Traefik and Caddy can do this on demand; plain Nginx cannot).5. Other hosting
A server without Docker
- Install Node.js 22, pnpm (
npm install -g pnpm) and PostgreSQL. Create a database and a user for Buildora. - In
buildora_web_nextjs/:cp .env.example .env, then setDATABASE_URL,APP_URLandAPP_SECRET. - Install, migrate and build:
pnpm install pnpm prisma:migrate:deploy pnpm build - Start it and keep it running with a process manager such as PM2:
npm install -g pm2 pm2 start "pnpm start" --name buildora pm2 save - Put Caddy in front for HTTPS (copy
deploy/Caddyfileand changeweb:3000to127.0.0.1:3000).
Uploads go to buildora_web_nextjs/uploads/ unless you set the S3_* keys. Back that folder up with your database.
Vercel with a managed database
Buildora runs on Vercel with a managed PostgreSQL (Neon, Supabase, Vercel Postgres…) and S3-compatible storage (Vercel has no permanent disk):
- Import the
buildora_web_nextjsfolder as a new Vercel project (framework: Next.js). - Add the environment variables:
DATABASE_URL,APP_URL,APP_SECRET, the fiveS3_*keys, and any optional keys. - Run the migrations once from your computer:
DATABASE_URL=… pnpm prisma:migrate:deploy. - Deploy, open the app and finish the install wizard.
*.yourbuilder.com to the project's domains for free site addresses, and add each customer domain to the project yourself (Vercel issues its certificate). Domain checks run when the customer presses "Check DNS now"; the 10-minute background re-check needs a long-running server. For a fully automatic custom-domain business, use the Docker stack.6. Install wizard and sample data
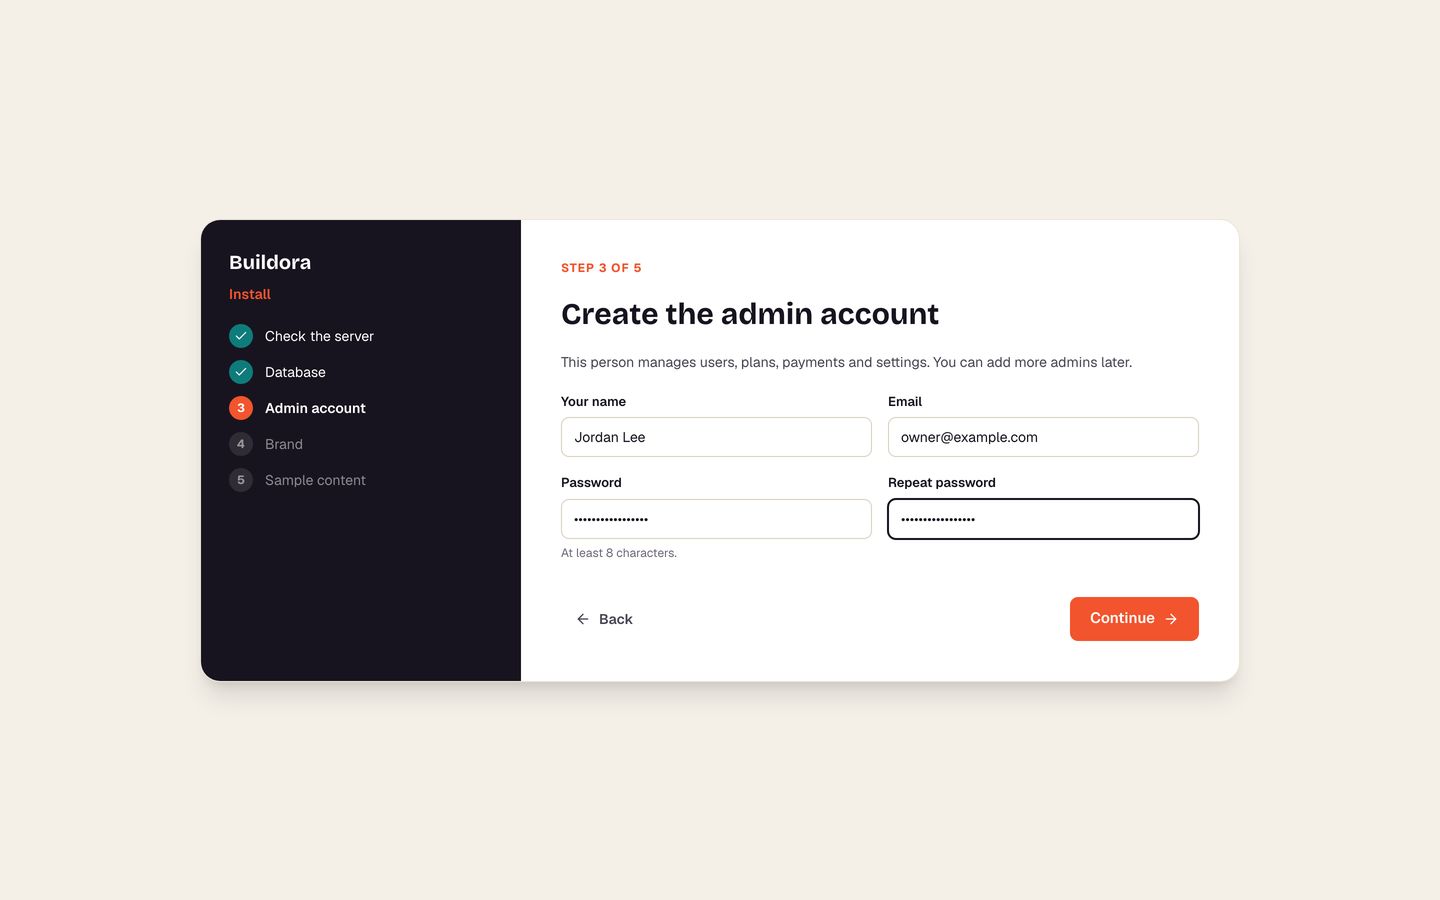
The first visit to a new install opens the wizard at /install:
- Check the server: Node.js version, uploads folder or storage bucket, and required settings.
- Database: confirms the connection and that the migrations ran.
- Admin account: your name, email and password.
- Brand: app name, brand colour and tagline (change them later in Admin → Settings).
- Sample content: the three plans and eight templates are always added. Tick "Add three sample sites" to see a finished account.
Remove the sample sites later in Admin → Settings → Sample data. The wizard locks itself once an admin exists.
7. Setup check
Admin → Setup lists every outside service, the keys it reads from .env, and its state: Working, Check or Not set. Press Test all to make a small live call to each (database, AI provider, Stripe, SMTP, storage, stock photos). Keys live only in .env; after changing one, restart the app (docker compose up -d) and test again.
From a terminal you can run the same check: pnpm doctor in buildora_web_nextjs/.
8. AI providers and credits
- Get a key from OpenAI, Anthropic or Google AI Studio.
- Add it to
.env(OPENAI_API_KEY,ANTHROPIC_API_KEYorGEMINI_API_KEY) and restart. - Open Admin → AI settings, pick the provider, check the model name, and press Test connection.
Defaults: OpenAI gpt-5-mini, Claude claude-opus-5-5, Gemini gemini-2.5-flash. Any model your key can use works; type its name in AI settings, or set OPENAI_MODEL, ANTHROPIC_MODEL or GEMINI_MODEL in .env (the .env value wins). Smaller models cost less per site.
Credits
Each plan includes AI credits per month. In AI settings you set what each action costs: a whole new site (default 25), a new page (5) and one section rewrite (1). Credits reset each billing month.
When the provider fails
With Fall back to the demo writer on (the default), a user still gets a complete site if the provider times out or rejects the key; they see a short notice. The demo writer is a built-in template engine that fills each section from the business description. Turn the switch off to show an error instead.
Extra instructions for the AI (tone, words to avoid, house style) go in the Writing instructions box in AI settings.
9. Stock photos
Add a free PIXABAY_API_KEY (pixabay.com/api/docs) or PEXELS_API_KEY (pexels.com/api). Then AI drafts come with matching photos and the editor's Find a photo searches them. A chosen photo is copied into your storage, so sites never depend on the photo site. Without a key, sections show a soft colour until the customer uploads a photo.
Photos are subject to each provider's licence; both allow use on websites without attribution.
10. Site addresses and custom domains
Free addresses
With ROOT_DOMAIN=yourbuilder.com and a wildcard DNS record, each site lives at name.yourbuilder.com. Without ROOT_DOMAIN, sites live at yourbuilder.com/s/name, which needs no extra DNS. Customers change the name on the site's Publish page.
Custom domains
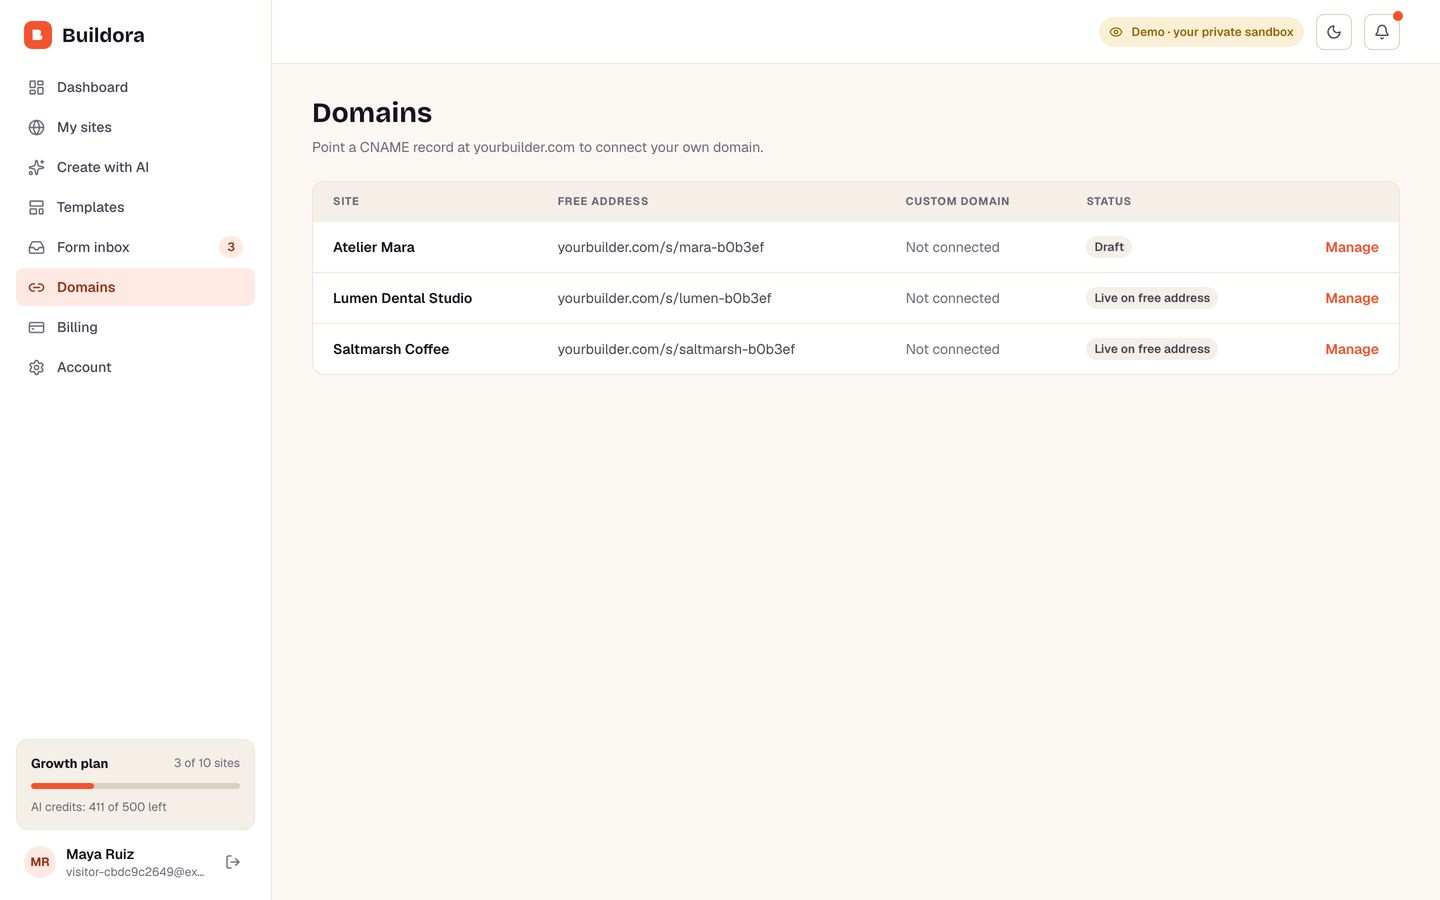
On plans with custom domains, the customer enters their domain on the Publish page and sees the exact DNS record to add:
- CNAME for
www(or any subdomain) pointing atCNAME_TARGET(defaultsites.ROOT_DOMAIN). - A record for the bare domain pointing at
SERVER_IP, when you set it.
Buildora checks the DNS when the domain is saved, when the customer presses Check DNS now, and every 10 minutes in the background. Once it points at you, Caddy issues the HTTPS certificate on the first visit.
11. Plans and payments (Stripe)
Plans
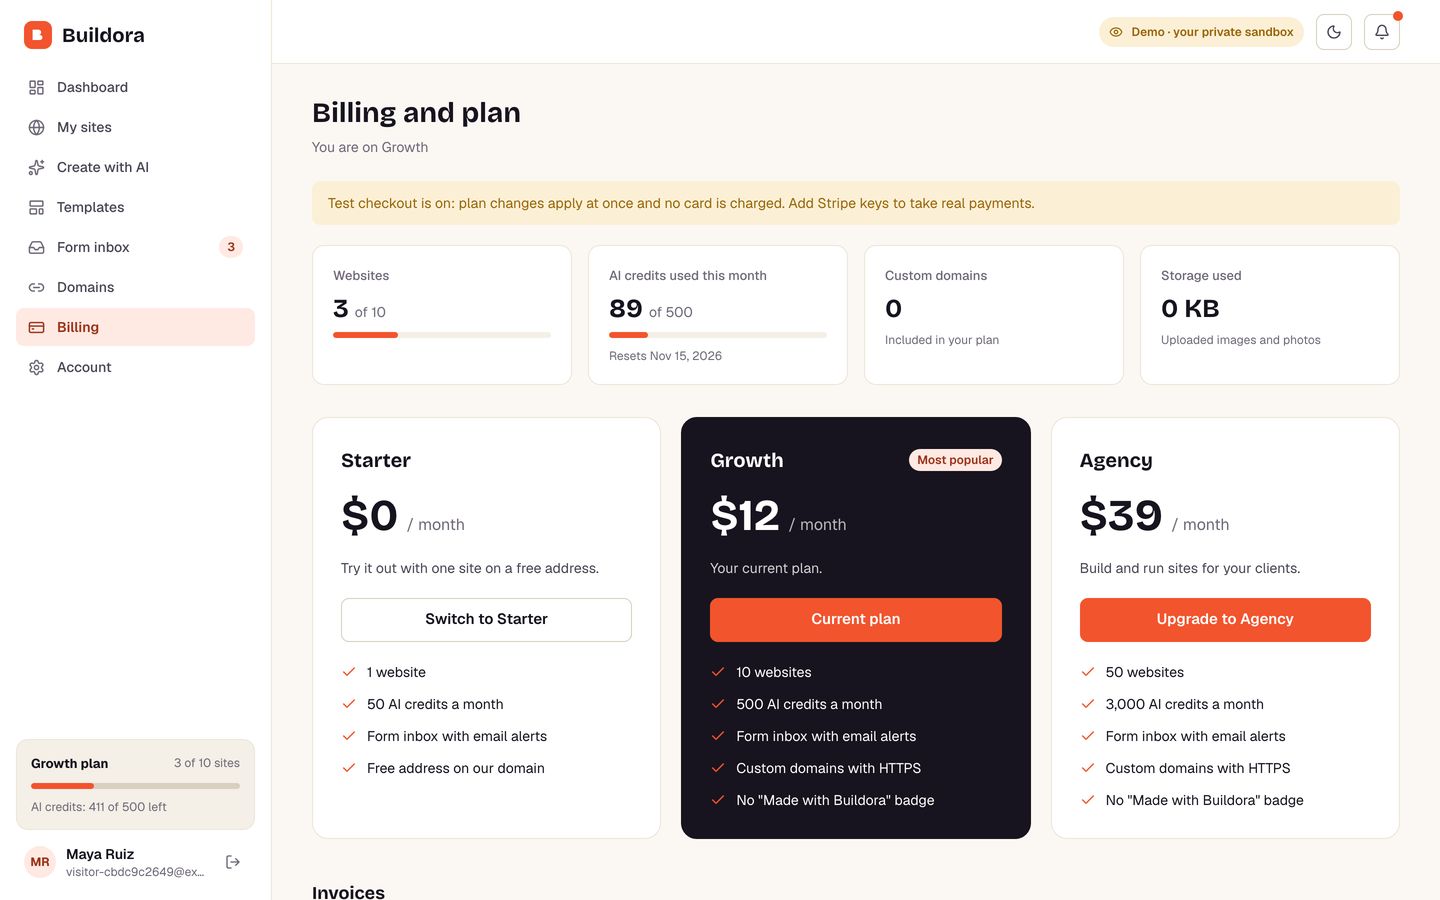
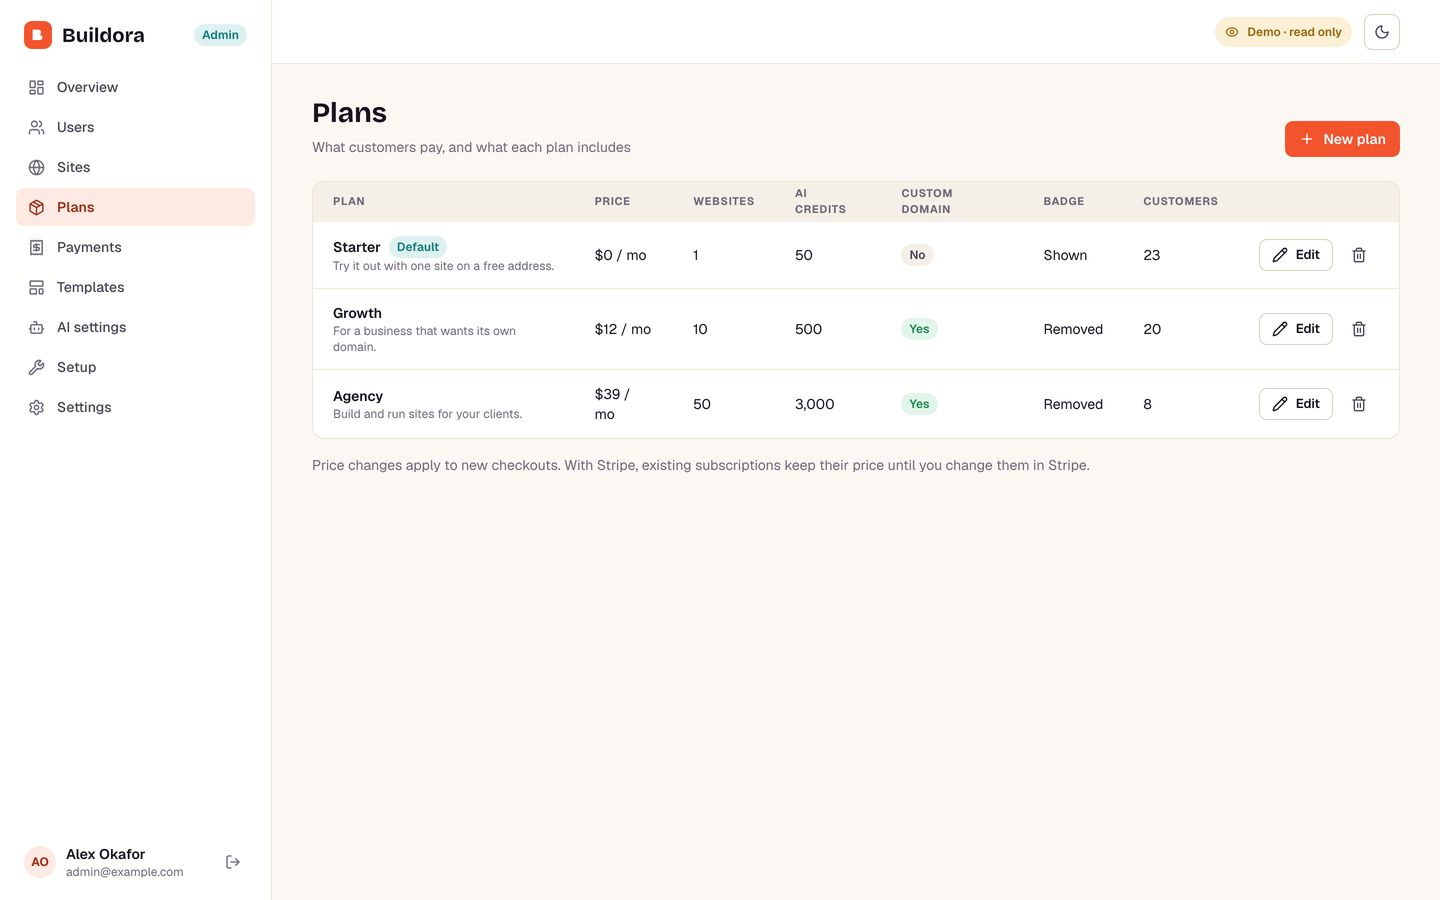
Admin → Plans edits each plan: name, monthly price, number of websites, AI credits, custom domains, whether the "Made with Buildora" badge can be removed, and which plan new users get. Three plans are included: Starter (free, 1 site, 50 credits), Growth ($12, 10 sites, 500 credits, custom domains) and Agency ($39, 50 sites, 3,000 credits).
Test checkout
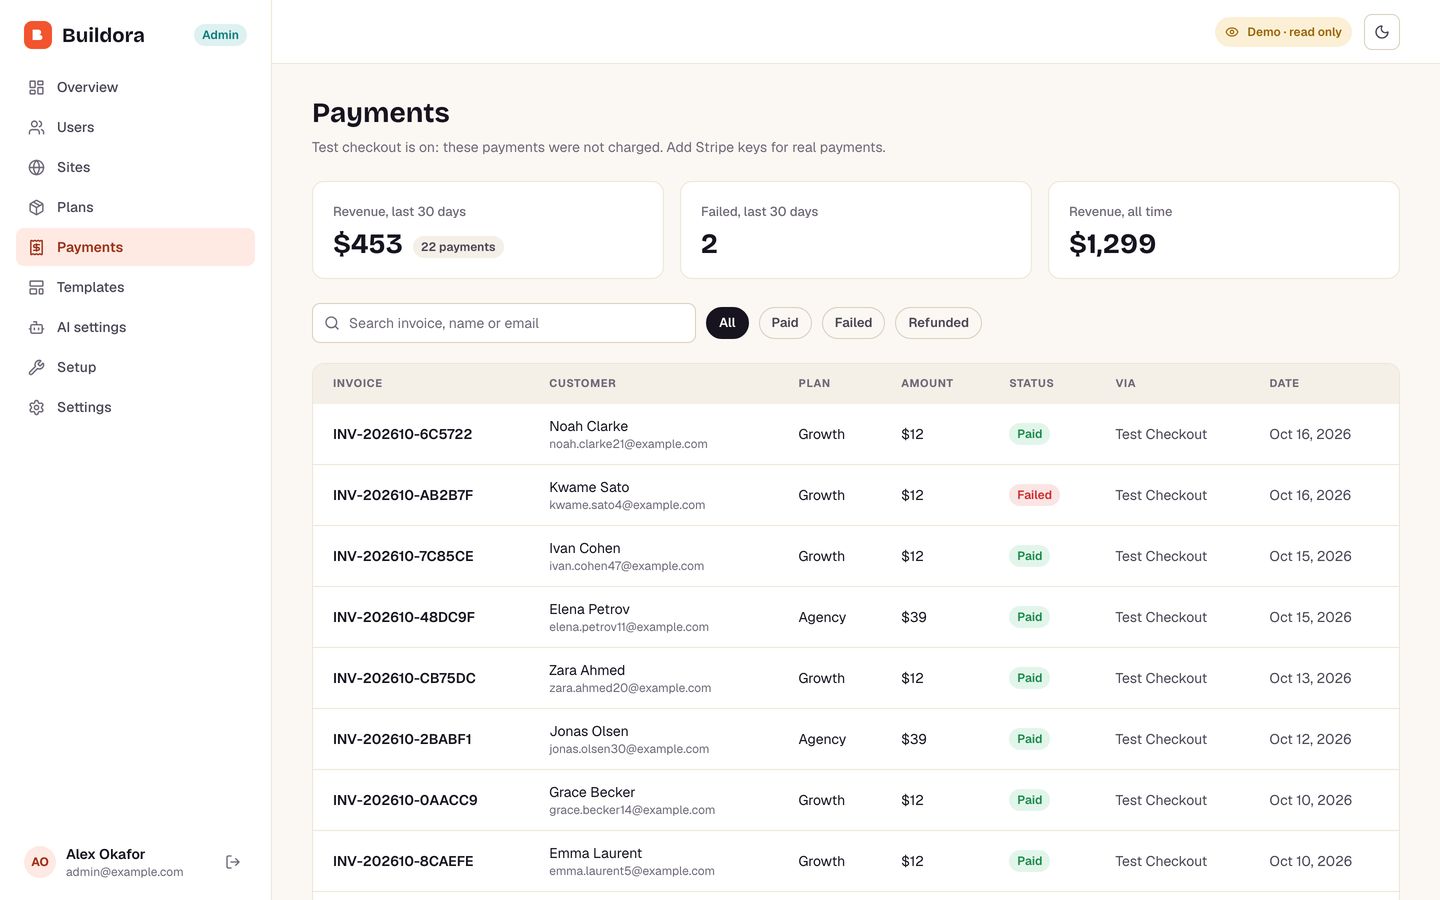
Without Stripe keys, upgrades go through a test checkout: the plan changes at once and a payment marked "Test checkout" is recorded, so you can try everything. Set DEMO_PAYMENTS=false to hide paid plans until Stripe is set.
Connect Stripe
- In the Stripe dashboard copy the secret key into
STRIPE_SECRET_KEY. Use ask_test_…key first. - Stripe → Developers → Webhooks → Add endpoint: URL
https://yourbuilder.com/api/billing/webhook, eventscheckout.session.completed,invoice.paid,invoice.payment_failedandcustomer.subscription.deleted. - Copy the endpoint's signing secret into
STRIPE_WEBHOOK_SECRET, restart, and test in Admin → Setup. - Turn on the Customer portal in Stripe (Settings → Billing → Customer portal) so customers can change cards and cancel.
Products and prices are created by Buildora at checkout from your plan settings, so there is nothing to copy from Stripe. A price change applies to new checkouts; existing subscriptions keep their price until you change them in Stripe.
12. Email
Set SMTP_HOST, SMTP_PORT, SMTP_USER, SMTP_PASS and SMTP_FROM with the details from your email provider. Buildora sends password-reset links and new form-message alerts. Without SMTP, each email is written to the app log instead (docker compose logs web), which is handy while testing.
13. File storage
Logos, uploads and copied stock photos are stored:
- in the MinIO container of the Docker stack (default), or
- in any S3-compatible bucket (AWS S3, Cloudflare R2, DigitalOcean Spaces…): set
S3_BUCKET,S3_ENDPOINT,S3_REGION,S3_ACCESS_KEY_IDandS3_SECRET_ACCESS_KEY, or - in a local folder (
UPLOAD_DIR, default./uploads) when no bucket is set.
Files are served through the app at /media/…, so the bucket stays private.
14. Using the builder
Create a site with AI
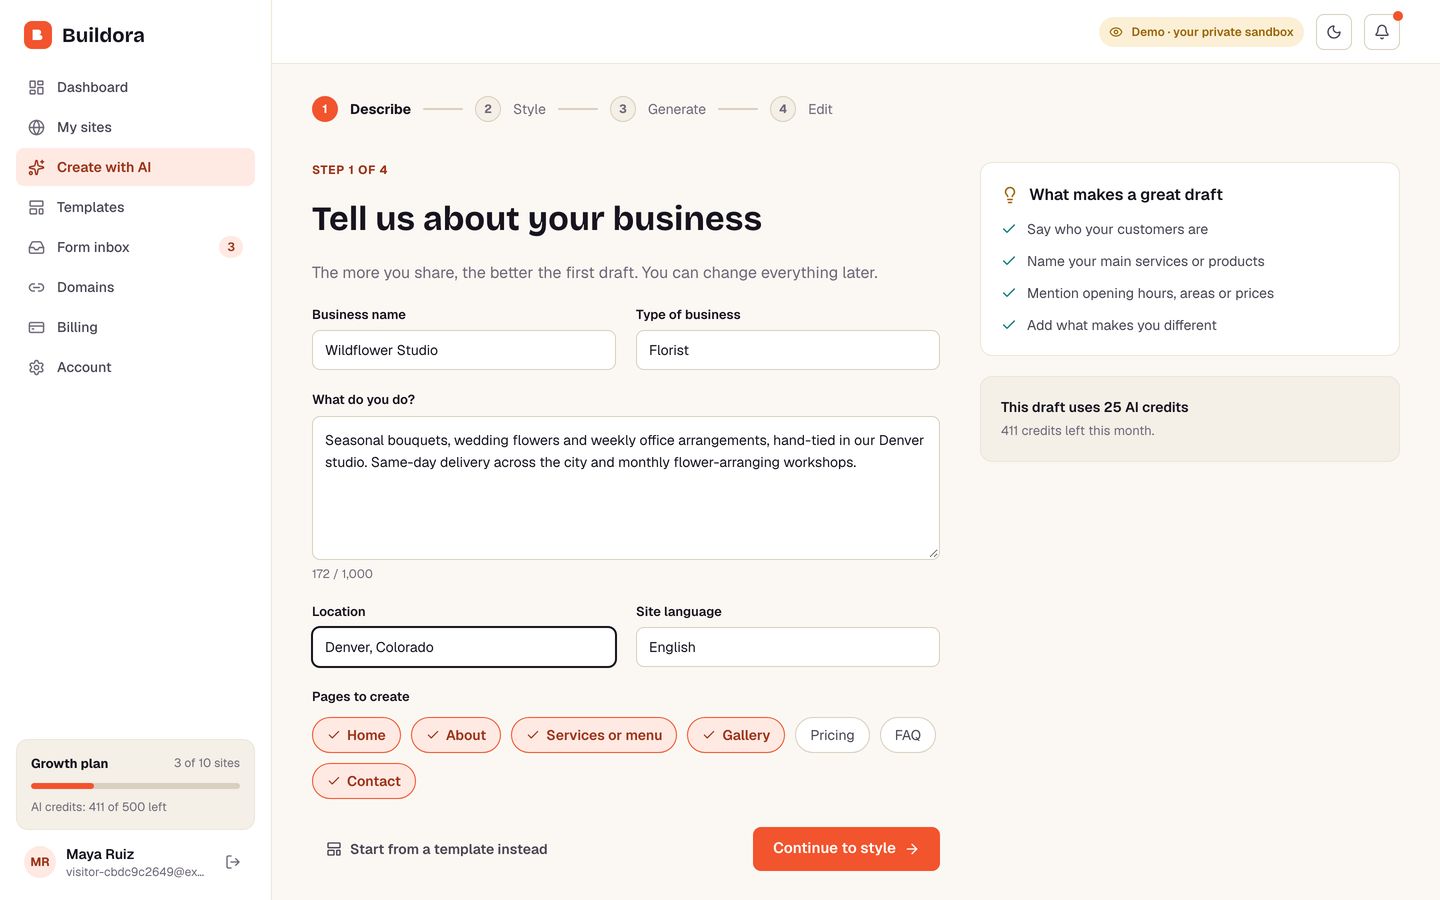
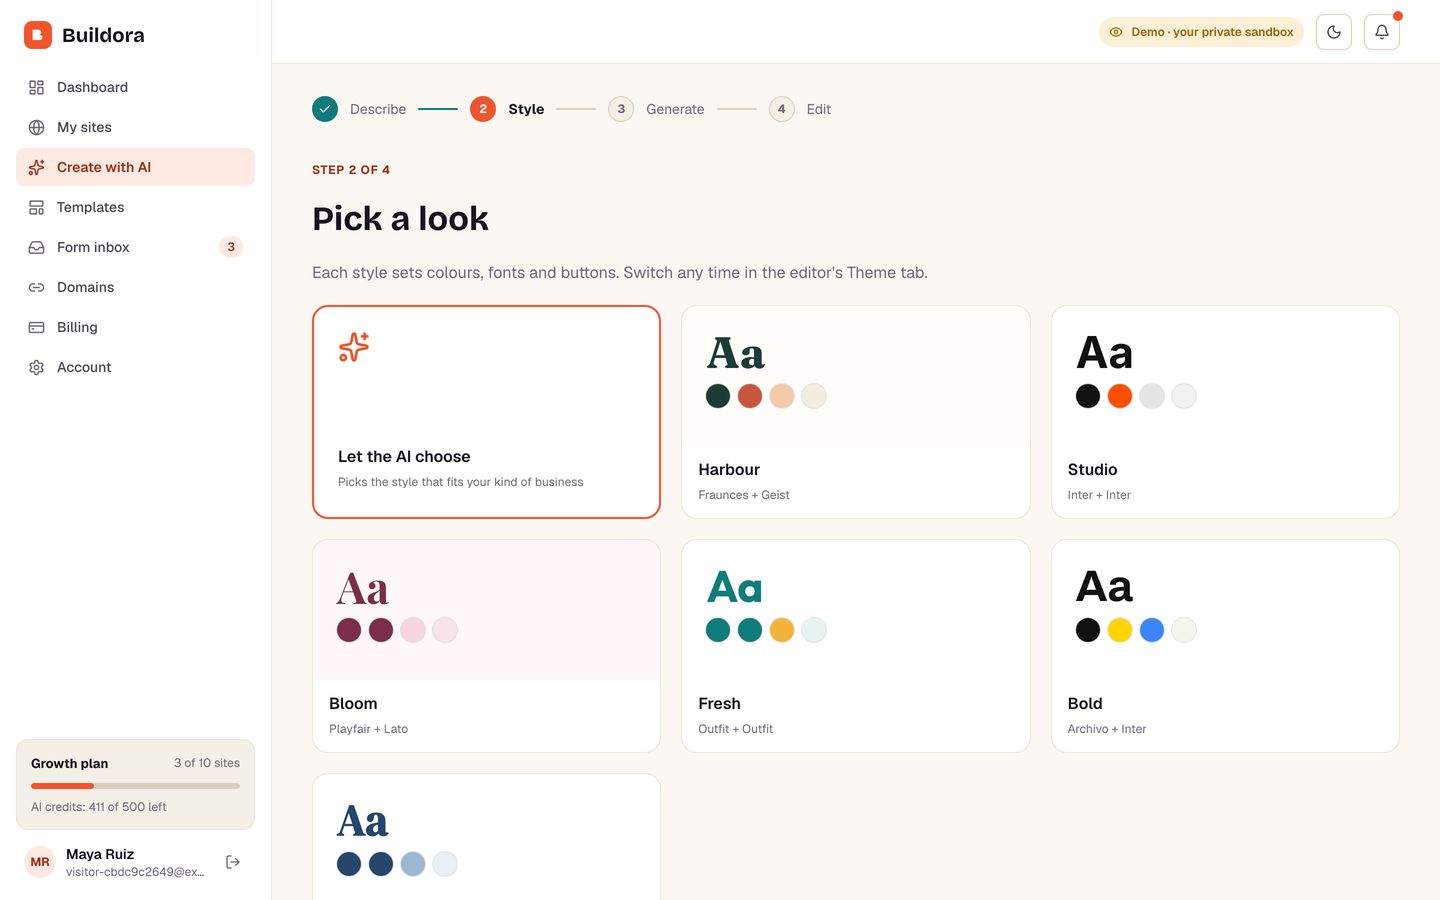
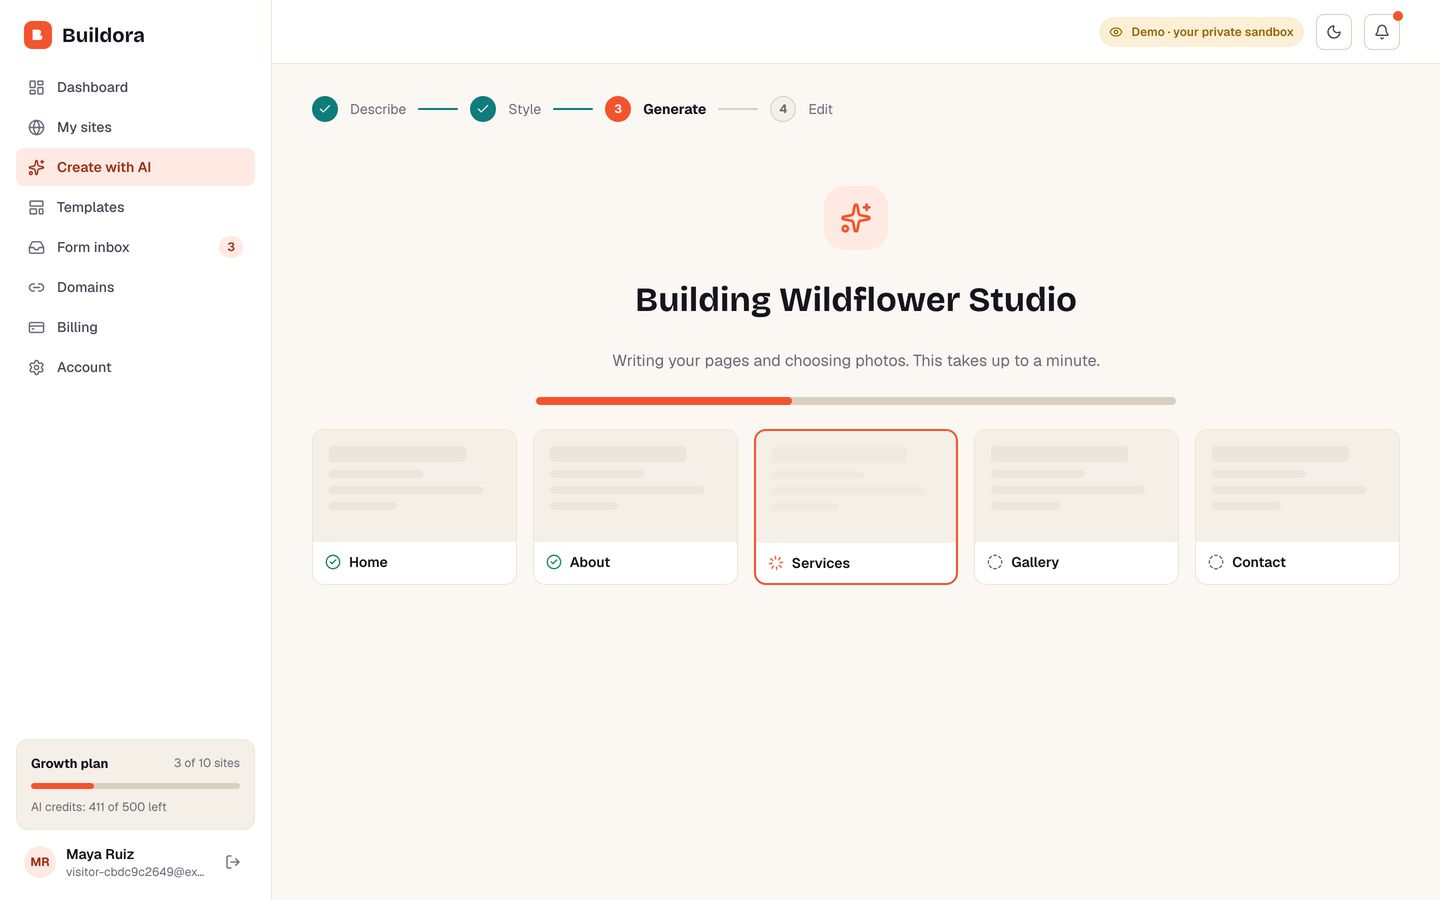
Dashboard → New site with AI. The customer enters the business name, type, a description, location, language and the pages to create, picks a style (or lets the AI choose), and presses Generate my site. About 20 to 60 seconds later the draft opens in the editor.
Or start from a template
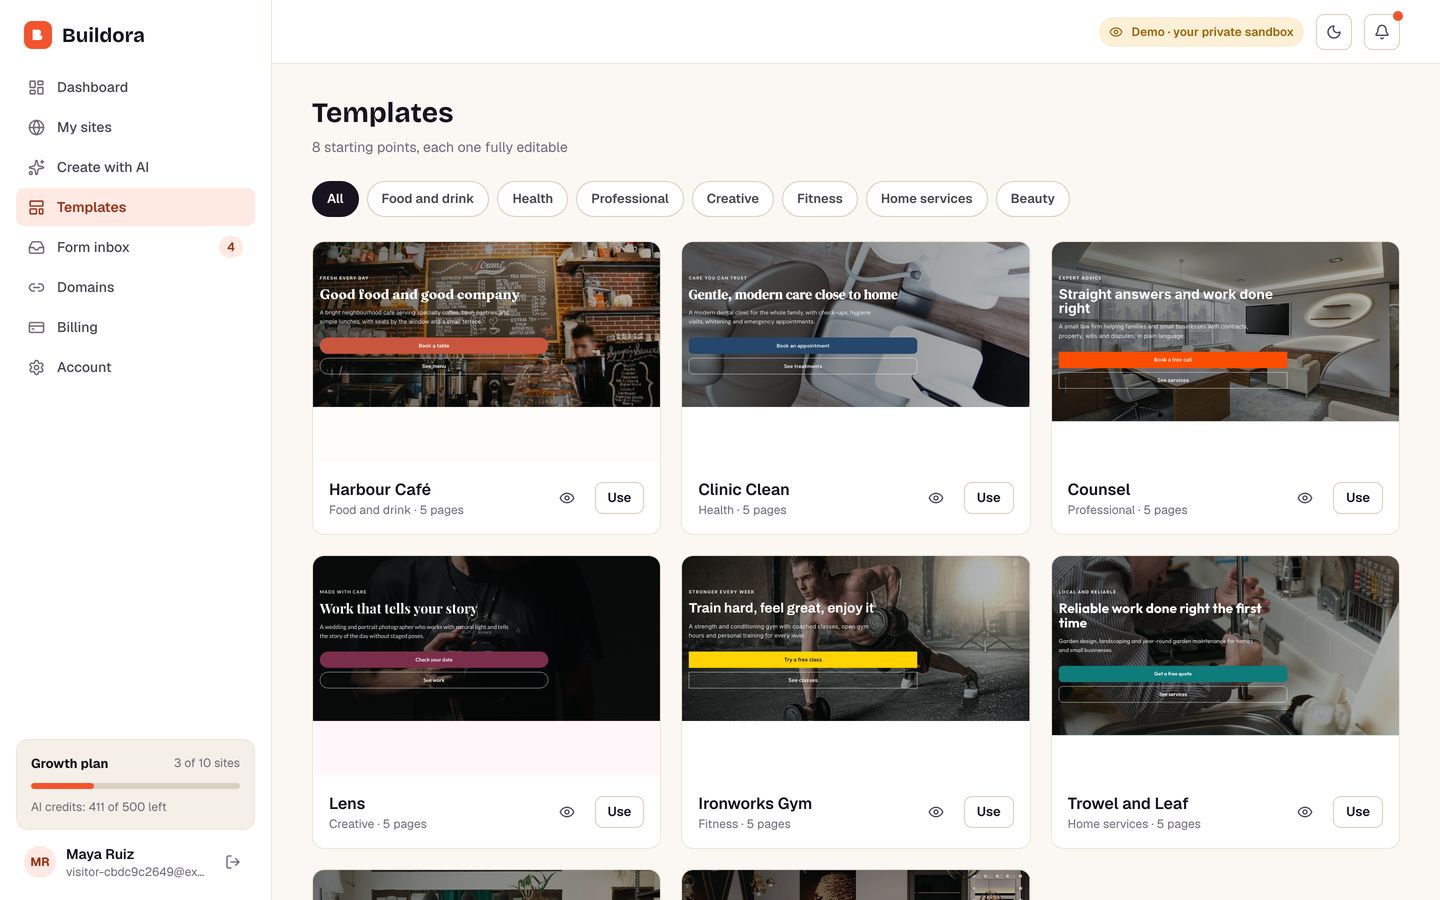
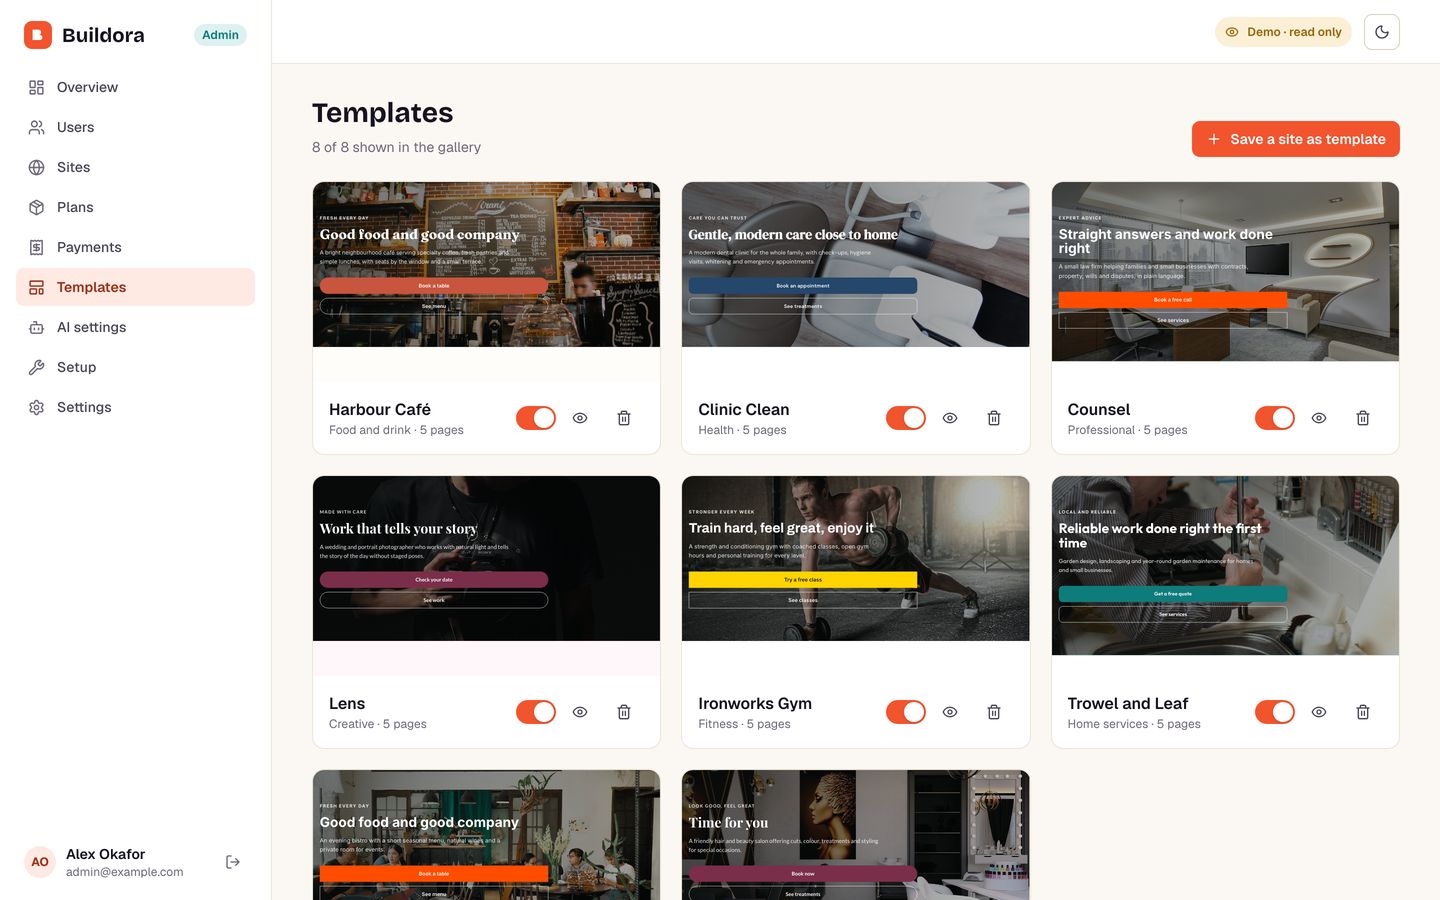
Templates → Use copies a finished site (café, clinic, law firm, photographer, gym, landscaping, restaurant, salon) into the account.
The editor
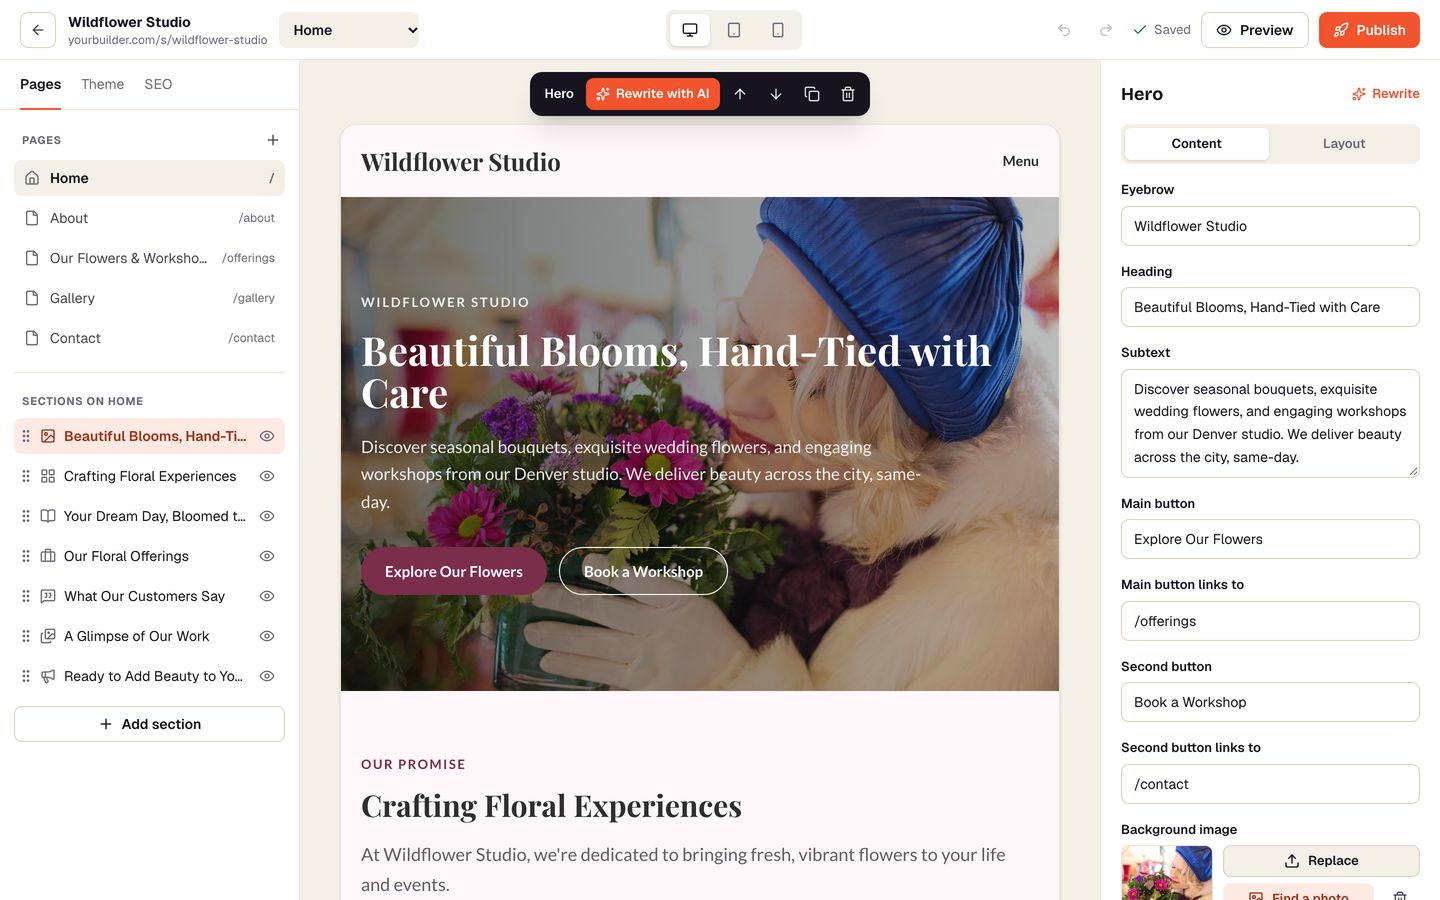
- Click any section on the page to edit its text, links, photos and layout on the right (Content and Layout tabs).
- The floating bar on a section: Rewrite with AI, move up or down, duplicate, delete.
- Left panel: pages (add, rename, reorder, delete), the sections of the current page (drag to reorder, eye icon to hide), Add section (14 types, or describe one and the AI writes it).
- Theme: six styles, every colour, heading and body fonts, button shape. SEO: page name, search title, description, with a Google preview.
- Desktop, tablet and phone preview; undo and redo; everything saves automatically.
- Publish makes the changes live. Each publish is kept as a version you can roll back to from the Publish page.
Forms
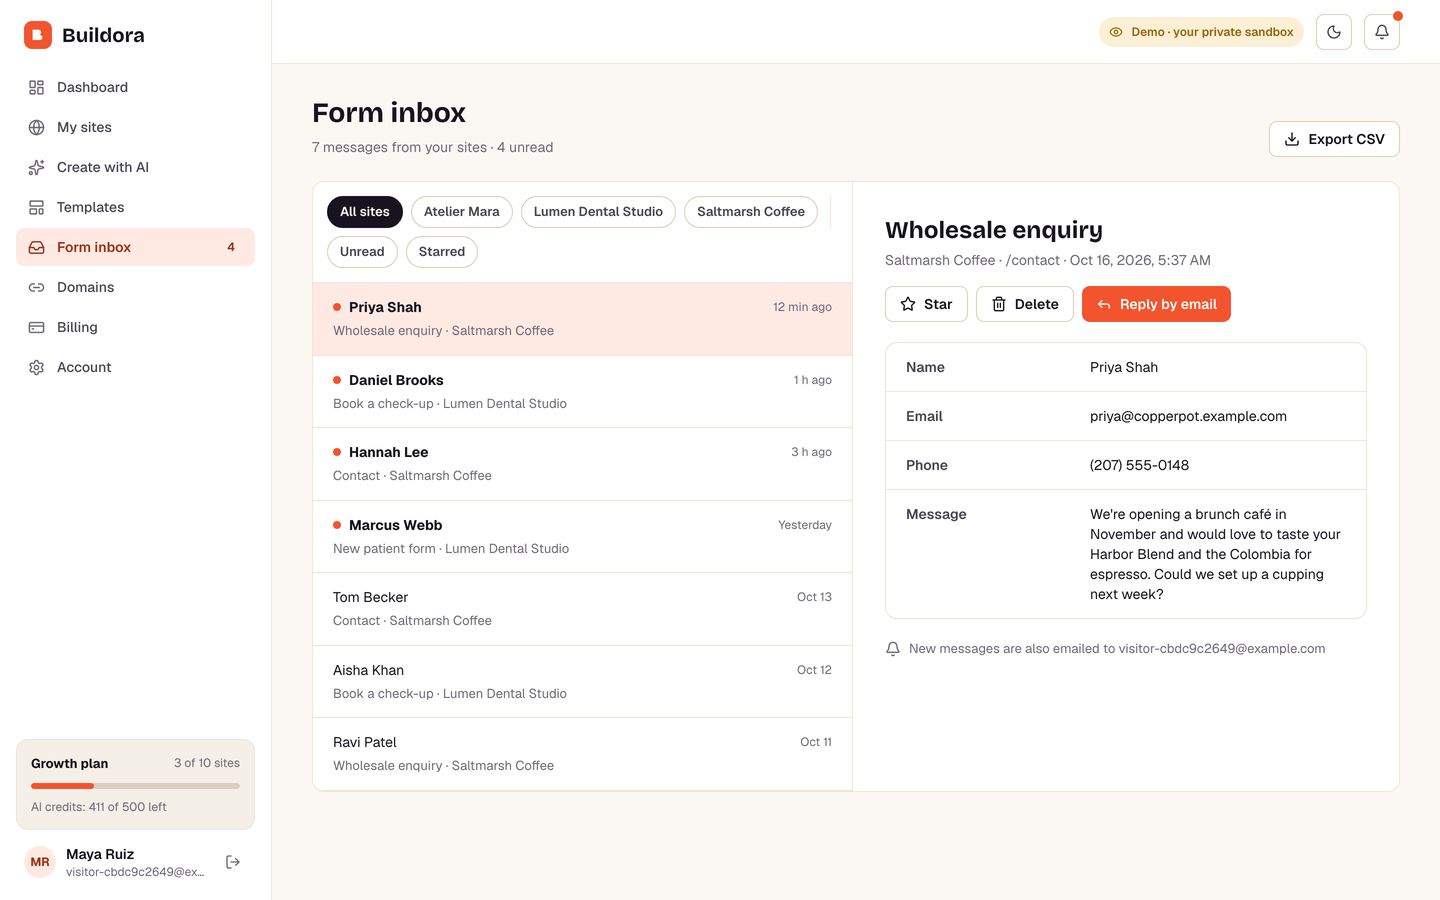
The Contact form section stores every message in the customer's Form inbox (filters, unread, starred, CSV export) and emails them when SMTP is set.
15. The admin panel
| Page | What you do there |
|---|---|
| Overview | Monthly recurring revenue, users, paying customers, live sites, AI usage, revenue chart, customers by plan, setup health. |
| Users | Search, filter by plan or status, change a plan (skips payment), reset AI credits, make or remove admins, suspend, reactivate or delete an account. |
| Sites | Every site with owner, status and pages; open it live or in the editor, take it offline, or delete it. |
| Plans | Edit prices, limits and features (see Plans and payments). |
| Payments | Every invoice with status, search and filters. |
| Templates | Show or hide templates, preview them, or turn any site into a new template. |
| AI settings | Provider, model, credit costs, fallback, instructions, usage. |
| Setup | Every key and a live test for each service. |
| Settings | Brand, sign-ups, the "Made with" badge, maintenance mode, legal pages, sample data. |
16. Rebrand without code
In Admin → Settings: app name, support email, tagline, logo, favicon, brand colour (any colour; the app's buttons and highlights follow it), heading font, default light or dark mode, terms and privacy links, and whether anyone can sign up. Changes apply at once to the landing page, the builder, emails and receipts.
The landing page text lives in src/app/page.tsx if you want to rewrite it in your own words.
17. Every key, explained
All keys go in deploy/.env (Docker) or buildora_web_nextjs/.env (no Docker). Only the first three are required.
| Key | Required | What it does |
|---|---|---|
| Required | ||
DATABASE_URL | Yes | PostgreSQL 15+ connection string. The Docker stack builds it for you. |
APP_URL | Yes | Public address of the app without a trailing slash, e.g. https://builder.example.com. |
APP_SECRET | Yes | A long random string (32+ characters). Protects sessions. Generate one with: openssl rand -hex 32. |
| Site addresses | ||
ROOT_DOMAIN | — | Domain for free site addresses (<name>.ROOT_DOMAIN). Needs a wildcard DNS record. Empty = sites live at APP_URL/s/<name>. |
CNAME_TARGET | — | Host customers point their own domain at. Defaults to sites.ROOT_DOMAIN, or the APP_URL host. |
SERVER_IP | — | Your server's public IPv4 (comma separated). Lets customers use an A record instead of a CNAME. |
| AI | ||
AI_PROVIDER | — | Forces a provider (openai, anthropic, gemini or demo). Empty = the choice in Admin → AI settings. |
OPENAI_API_KEY | — | OpenAI key from https://platform.openai.com/api-keys. |
OPENAI_MODEL | — | Overrides the OpenAI model set in Admin → AI settings. |
ANTHROPIC_API_KEY | — | Anthropic (Claude) key from https://console.anthropic.com/settings/keys. |
ANTHROPIC_MODEL | — | Overrides the Claude model set in Admin → AI settings. |
GEMINI_API_KEY | — | Google Gemini key from https://aistudio.google.com/apikey. |
GEMINI_MODEL | — | Overrides the Gemini model set in Admin → AI settings. |
| Stock photos | ||
PIXABAY_API_KEY | — | Free key from https://pixabay.com/api/docs/. Turns on photo search and photos in AI drafts. |
PEXELS_API_KEY | — | Free key from https://www.pexels.com/api/ (used when no Pixabay key is set). |
| Payments | ||
STRIPE_SECRET_KEY | — | Stripe secret key from https://dashboard.stripe.com/apikeys. Empty = demo checkout. |
STRIPE_WEBHOOK_SECRET | — | Signing secret of the webhook endpoint APP_URL/api/billing/webhook (Stripe → Developers → Webhooks). |
DEMO_PAYMENTS | — | "false" hides the demo checkout while Stripe is not set (paid plans are then unavailable). |
SMTP_HOST | — | SMTP server (any provider: Amazon SES, Postmark, Mailgun, Gmail…). Empty = emails are printed to the log. |
SMTP_PORT | — | Usually 587 (or 465 with SMTP_SECURE=true). |
SMTP_USER | — | SMTP user name. |
SMTP_PASS | — | SMTP password or API key. |
SMTP_SECURE | — | "true" for port 465 (TLS from the start). |
SMTP_FROM | — | Sender address, e.g. hello@yourdomain.com. Defaults to SMTP_USER. |
| File storage | ||
S3_BUCKET | — | Bucket for uploads (AWS S3, Cloudflare R2, MinIO…). Empty = the local uploads folder. |
S3_ENDPOINT | — | Endpoint for non-AWS stores, e.g. https://<account>.r2.cloudflarestorage.com. |
S3_REGION | — | Region, e.g. us-east-1 (R2: auto). |
S3_ACCESS_KEY_ID | — | Access key for the bucket. |
S3_SECRET_ACCESS_KEY | — | Secret key for the bucket. |
UPLOAD_DIR | — | Local folder for uploads when no bucket is set. Default: ./uploads. |
| Demo | ||
DEMO_MODE | — | "true" only for a public demo: one-click demo sign-in, read-only admin, nightly reset, no emails. |
The Docker stack also reads POSTGRES_DB, POSTGRES_USER, POSTGRES_PASSWORD (it builds DATABASE_URL from them) and WEB_PORT.
18. File structure
buildora_web_nextjs/
  src/app/                 pages and API routes (App Router)
    page.tsx               your landing page
    (auth)/                sign in, sign up, password reset
    install/               the install wizard
    app/                   the builder (dashboard, sites, editor, inbox, billing…)
    admin/                 the admin panel
    s/ d/ t/               published sites (free address, custom domain, template preview)
    api/                   JSON API used by the builder and admin
  src/components/          React components (editor/, app/, admin/, site/, marketing/)
  src/lib/blocks.ts        the 14 section types: fields and defaults
  src/lib/themes.ts        the six styles, colours and fonts of published sites
  src/lib/server/          auth, AI adapters, billing, email, storage, stock photos, jobs
  src/database/            Prisma schema, migrations and seed data
  src/tests/               unit and API tests (Vitest)
  e2e/                     browser tests (Playwright)
deploy/
  docker-compose.yml       the whole stack
  Caddyfile                automatic HTTPS
  .env.example             every setting, explained
19. Customise the code
Run it for development
cd buildora_web_nextjs
cp .env.example .env        # set DATABASE_URL, APP_URL=http://localhost:3000, APP_SECRET
pnpm install
pnpm prisma:migrate:deploy
pnpm dev
Checks: pnpm lint, pnpm typecheck, pnpm test (uses TEST_DATABASE_URL or DATABASE_URL; the tests work in their own schema), pnpm e2e.
Add a section type
- Add its fields and defaults to
BLOCK_KINDSinsrc/lib/blocks.ts. The editor builds its form from these fields, and the AI is told about them automatically. - Draw it in
src/components/site/site-renderer.tsx, next to the existing types.
Add a style
Add a preset to src/lib/themes.ts (colours, fonts, button shape). New fonts go in src/app/fonts.ts; they are self-hosted at build time, so published sites call no font server.
Add an AI provider
Providers live in src/lib/server/ai/providers.ts. Each one takes a system prompt and a user message and returns JSON; add yours there and to the provider list in AI settings.
20. Updating
- Back up your database (
docker compose exec postgres pg_dump -U buildora buildora > backup.sql) and your.env. - Replace the
buildora_web_nextjs/folder with the new one. Keepdeploy/.env. - Run
docker compose up -d --build. Migrations run automatically before the app starts.
If you changed the code, compare your changes with the new version first (a Git repository makes this easy). Read CHANGELOG.md for what changed.
21. FAQ and troubleshooting
The page says "Install" again after a restart.
The app cannot see its database. Check docker compose ps and docker compose logs migrate; in a non-Docker install check DATABASE_URL.
AI drafts look generic.
No AI key is set, or the provider failed and the demo writer answered. Open Admin → AI settings, press Test connection, and look at docker compose logs web for lines starting with [ai].
Sites have no photos.
Add a Pixabay or Pexels key (see Stock photos). Existing sites keep their sections; use Find a photo in the editor.
A customer domain stays "Waiting for DNS".
DNS changes can take up to an hour. Check the record with dig www.customer.com: it must show your CNAME_TARGET or SERVER_IP. Cloudflare users must set the record to "DNS only" (grey cloud).
HTTPS does not work for a domain.
Ports 80 and 443 must be open, the app must be started with --profile https, and the domain must already point at the server. docker compose logs caddy shows each certificate request.
I forgot the admin password.
Use "Forgot password" on the sign-in page (with SMTP set, or read the link in the log).
Upgrades do not change the plan with Stripe.
The webhook is missing or its secret is wrong. Check Stripe → Webhooks for failed deliveries and Admin → Setup → Payments.
Port 3000 is already used.
Set WEB_PORT to a free port in deploy/.env and run docker compose up -d.
22. Credits
Buildora is built with these open-source projects, each under its own licence (MIT unless noted):
- Next.js and React
- Prisma (Apache 2.0) and node-postgres
- Tailwind CSS, shadcn/ui and Base UI
- Lucide icons (ISC)
- Sonner, Zod, Nodemailer (MIT-0)
- Stripe Node, Anthropic SDK, AWS SDK for JavaScript (Apache 2.0)
- Fonts from Google Fonts (SIL Open Font Licence): Geist, Bricolage Grotesque, Fraunces, Playfair Display, DM Serif Display, Archivo, DM Sans, Inter, Lato, Outfit. They are self-hosted at build time.
- Docker images: PostgreSQL, MinIO (AGPL 3.0, runs as a separate service) and Caddy (Apache 2.0).
The photos in our live demo come from Pixabay and are not included in the download. Templates in the download have no photos; with a stock photo key, photos are fetched for each new site.
23. Changelog
Version 1.0.0 (16 October 2026)
- First release: AI site wizard (OpenAI, Anthropic, Gemini and a built-in demo writer), block editor with 14 section types, AI section rewrite and "describe a section", six styles, SEO, phone and tablet preview, publishing with version history.
- Free subdomains, path addresses and custom domains with DNS checks and automatic HTTPS (Caddy on-demand TLS).
- Plans, AI credits, Stripe subscriptions with webhook and customer portal, invoices, test checkout.
- Admin panel: overview, users, sites, plans, payments, templates, AI settings, setup check, settings and branding.
- Install wizard, eight templates, sample data, Docker Compose stack, Vitest and Playwright tests.
24. Support and licence
Questions, bug reports and help with installation: use the Support tab on the item's page on the marketplace. Please include your Buildora version, how you host it (Docker, Node.js or Vercel) and what you see (a screenshot or the lines from docker compose logs web). Never send us your API keys or passwords.
Support covers questions about the item's features, help with bugs and help with installing it as described here. It does not cover custom changes to the code or third-party services.